10 Easy Steps to Building a Closet for your Toddler
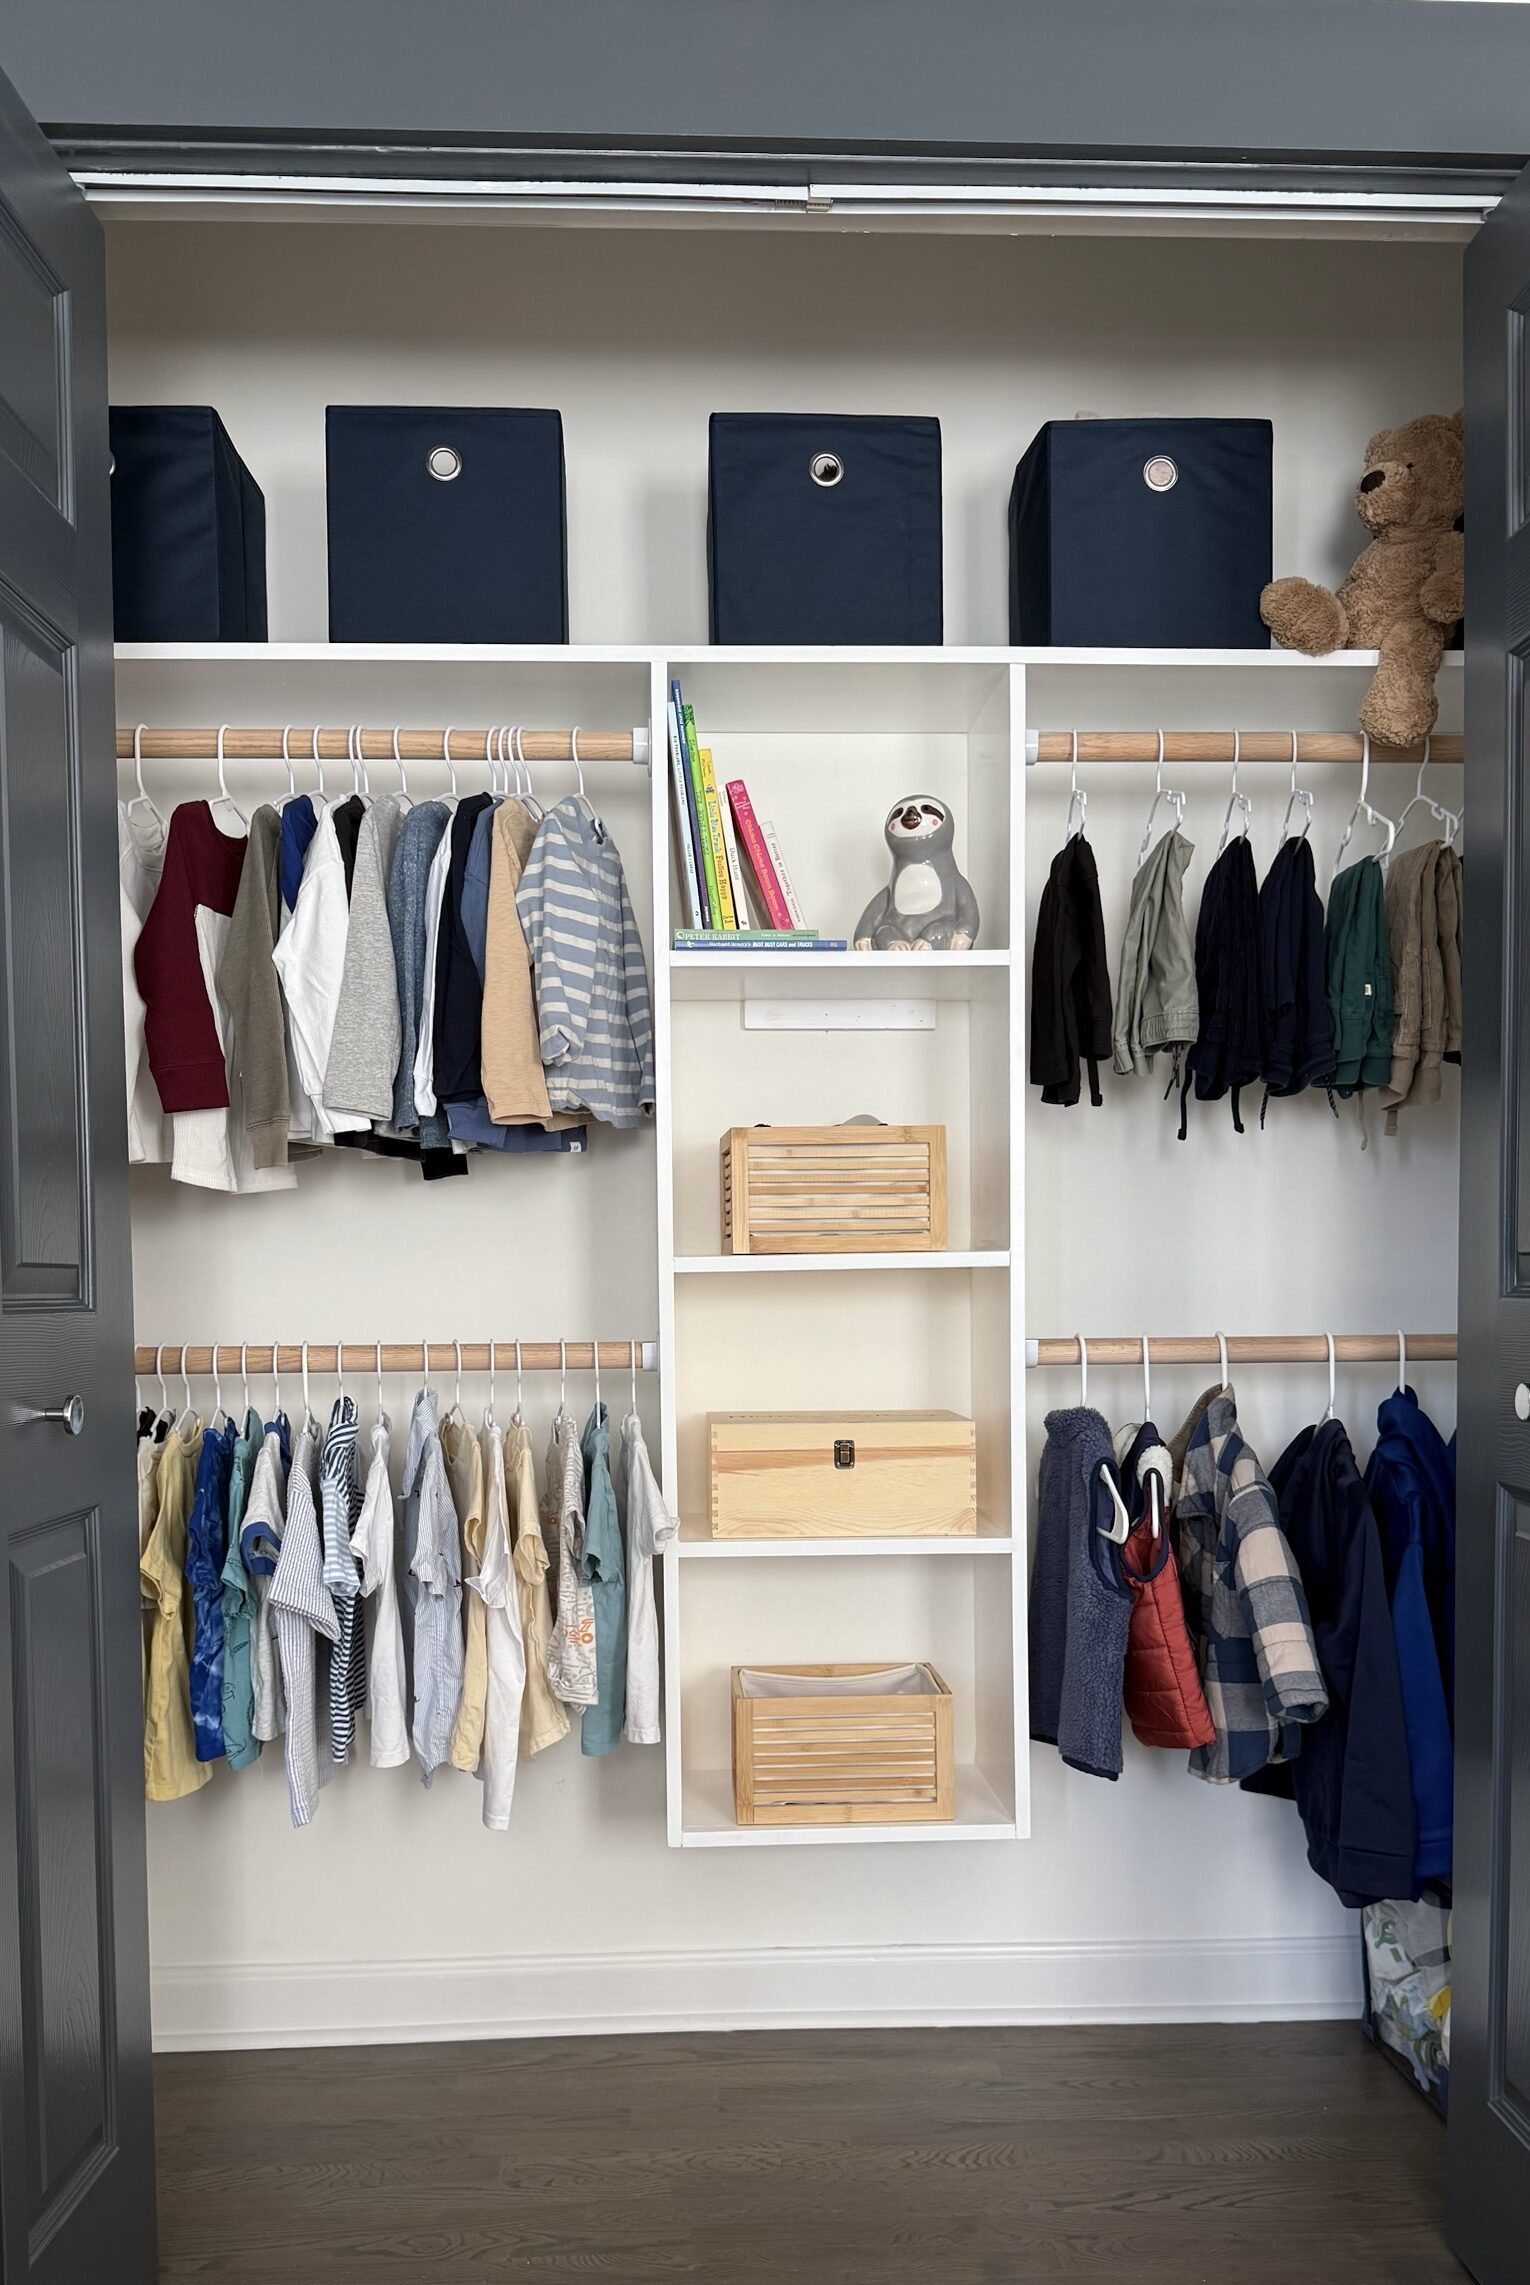
My little one is officially growing up, and we’ve recently transitioned his room into a big boy space. This meant creating a closet that’s both functional and personal to my kids needs. I wanted him to have enough space for clothes, toys, and all his new “big boy” things. Here’s how I built the perfect big boy closet, step-by-step:
Materials:
- Plywood
- Closet Rods
- Closet Rod Sockets
- Shelf Brackets
- Measuring Tape
- Miter Saw
- Cordless Drill
- Primer
- Paint
- Wood Glue
- Sandpaper
- ¾ Power Pro Screws
- 10×2.5 Screws
- RZ Mask
- Laser Level
- Caulk

1. Measure Your Closet Space
for the Best Toddler Closet Organization
Before you start, measure your closet space. I just grabbed my measuring tape and jotted down the height, width, and depth of the closet. It’s super important to think about how much hanging space vs. shelf space you’ll need. For me, I ended up putting in four closet rods at different heights—one higher up for jackets and longer stuff, and one lower down for shirts, pants, and other shorter clothes. This setup really helped make the most of the closet space, and now it’s easy for my toddler to reach his clothes
2. Plan and Design
Almost like a Puzzle
Designing the layout was like putting together a puzzle. I divided the closet into sections:
- A: Hanging space for clothes.
- B: Cubbies for toys and shoes.
- C: Shelves for books and other items.
This design allowed for a balance between hanging storage and organizing cubbies, ensuring the closet would be both functional and fun for my toddler.

3. Prep The Walls
Spackle, Sand, Paint
Before I could start building, I prepped the walls. I filled in any holes with spackle, sanded everything smooth, and gave the walls a fresh coat of neutral white paint. This simple step helped blend the closet into the room and gave it a polished look. Proper wall preparation, including spackling, sanding, and painting, is a must for getting that professional, seamless finish.

4. Assemble the Cubbies
Cut Pieces, Glue, Caulk, Sand, Paint
Once the walls were ready, I moved on to the cubbies. I cut the plywood pieces for the shelves and cubbies using a miter saw. Here’s the process:
- Cut the plywood for each shelf and cubby.
- Glue and screw the pieces together for added strength.
- Caulk the seams for a smooth, polished look.
- Sand the edges to ensure they’re smooth and even.
- Paint the cubbies with a fresh coat for a clean finish.

5. Measure Everything Out
Using a Laser Level
One thing I tell myself countlessly is that precision is key!! So I used a laser level to make sure all the lines were straight and everything aligned correctly. This step makes sure that the rods, cubbies, and shelves would be perfectly level.

6. Add a Cleat
1×3 Piece of Wood
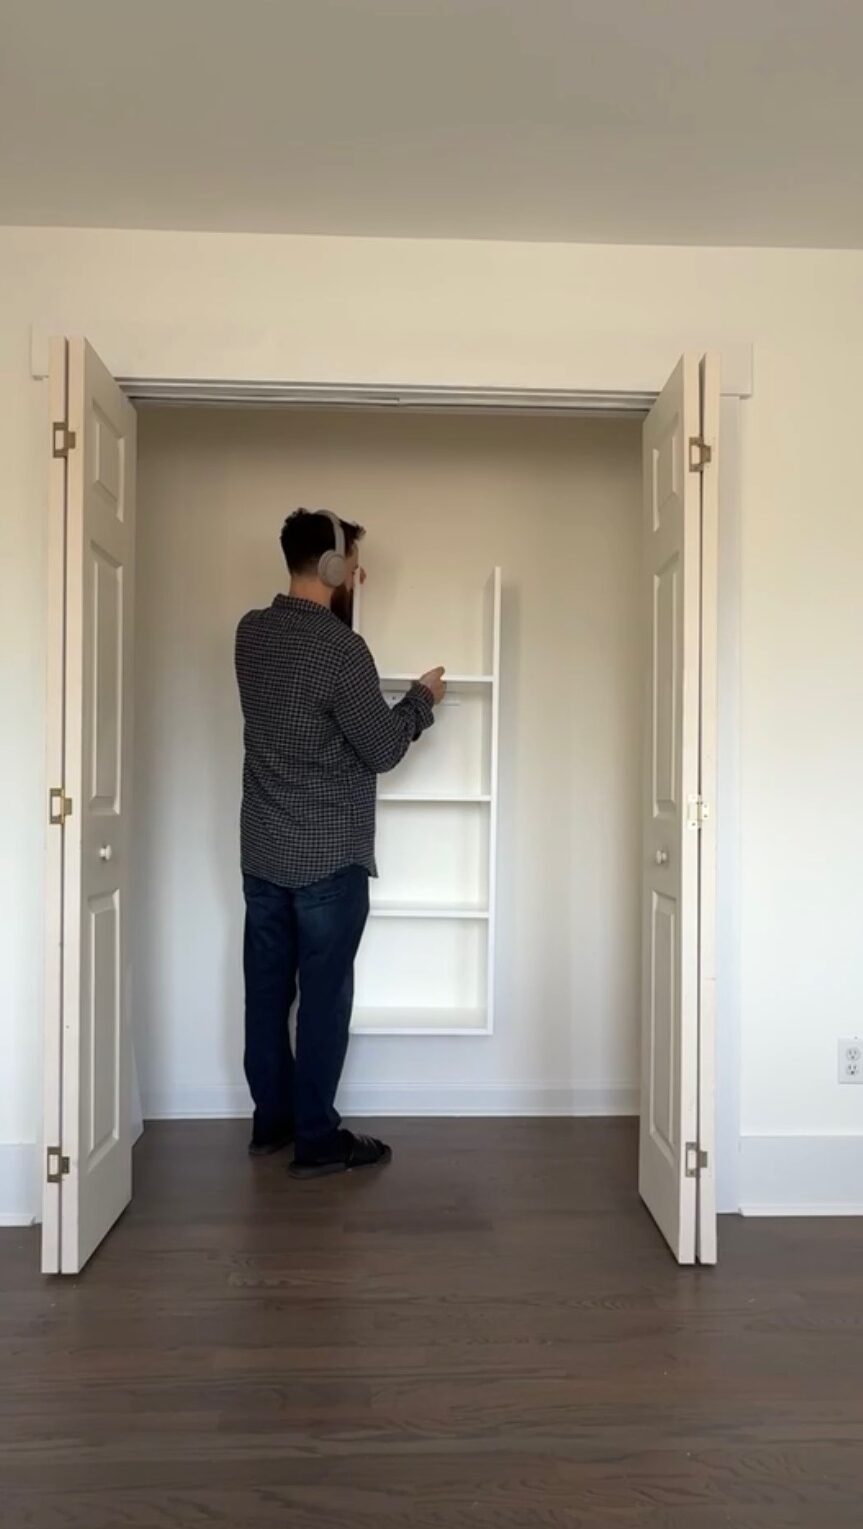
To provide extra stability and peace of mind, I added a cleat on the back centered wall. I cut a 1×3 piece of wood with a miter saw, which I attached to the wall to support the weight of the shelves. The cleat prevents the shelves from shifting or bowing over time, ensuring the closet stays sturdy.
7. Install the Cubbies
The Easy Part!
With the cleat in place, it’s time to add the cubbies. I secured each cubby into place, making sure everything was level and aligned with the cleat. This was the easiest part, since everything had been prepped and measured carefully in the previous steps.
8. Add Top Shelf
Horizontal Storage
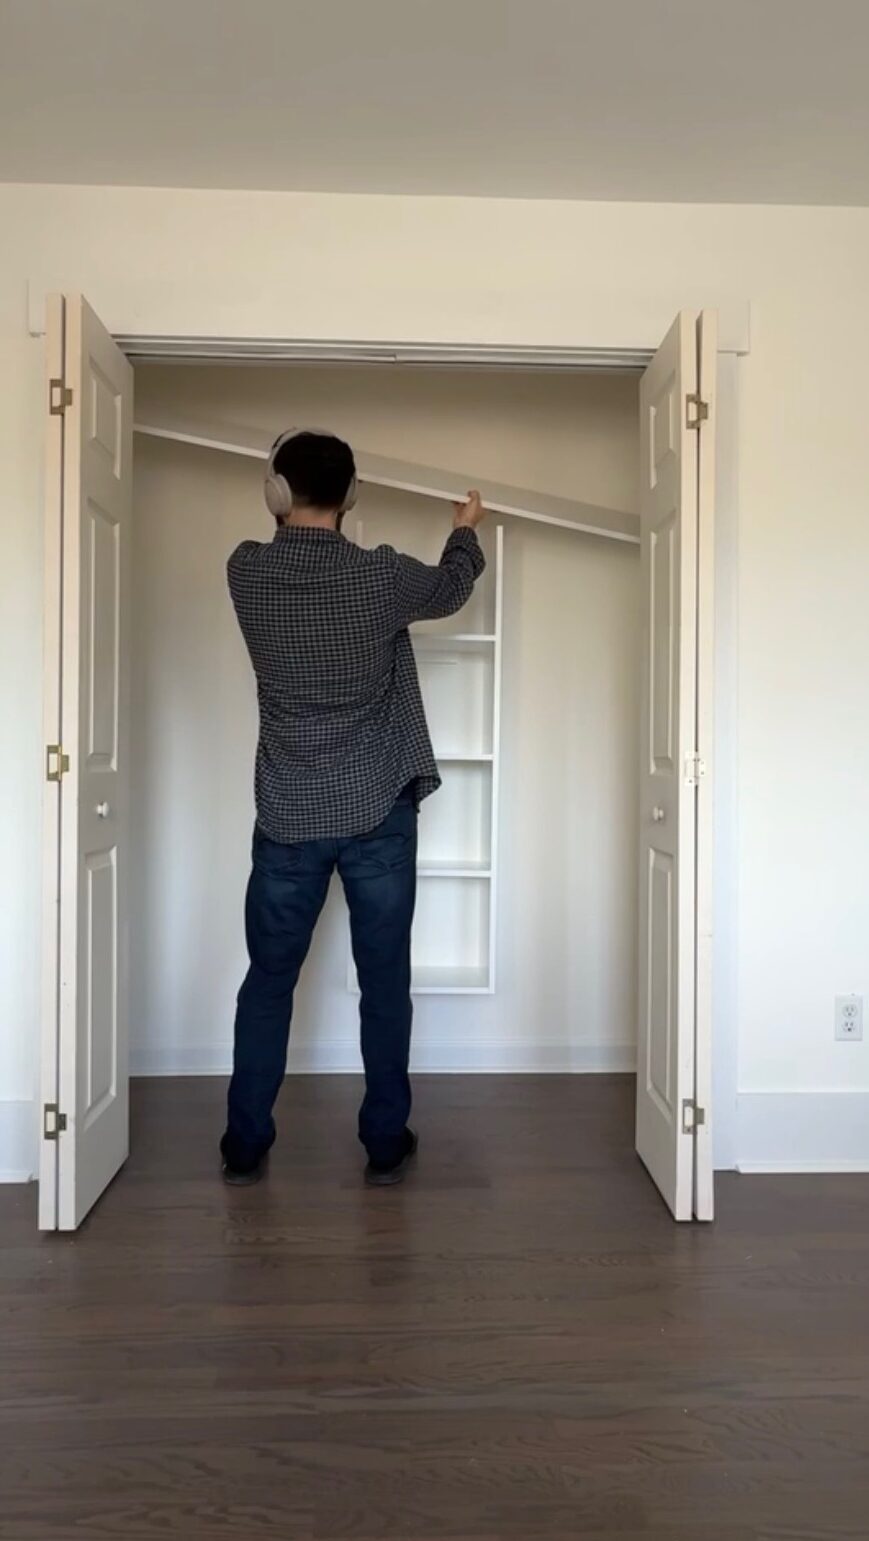
The top shelf was the final horizontal storage piece to go in. I used sturdy shelf brackets to support the weight of the shelf and made sure it was securely fastened. This shelf added extra storage space for keepsakes, and other items he won’t be reaching for each day.

9. Caulk Each Corner and Edge
Where Cubbies/Shelves Meet the Wall
Once everything was installed, I went back and caulked all the seams where the cubbies and shelves met the wall. This gave the closet a clean, finished look and ensured that any small gaps were filled in, making it look seamless.
10. Drill Each Closet Rod
Shallow ¾” Power Pro Screws
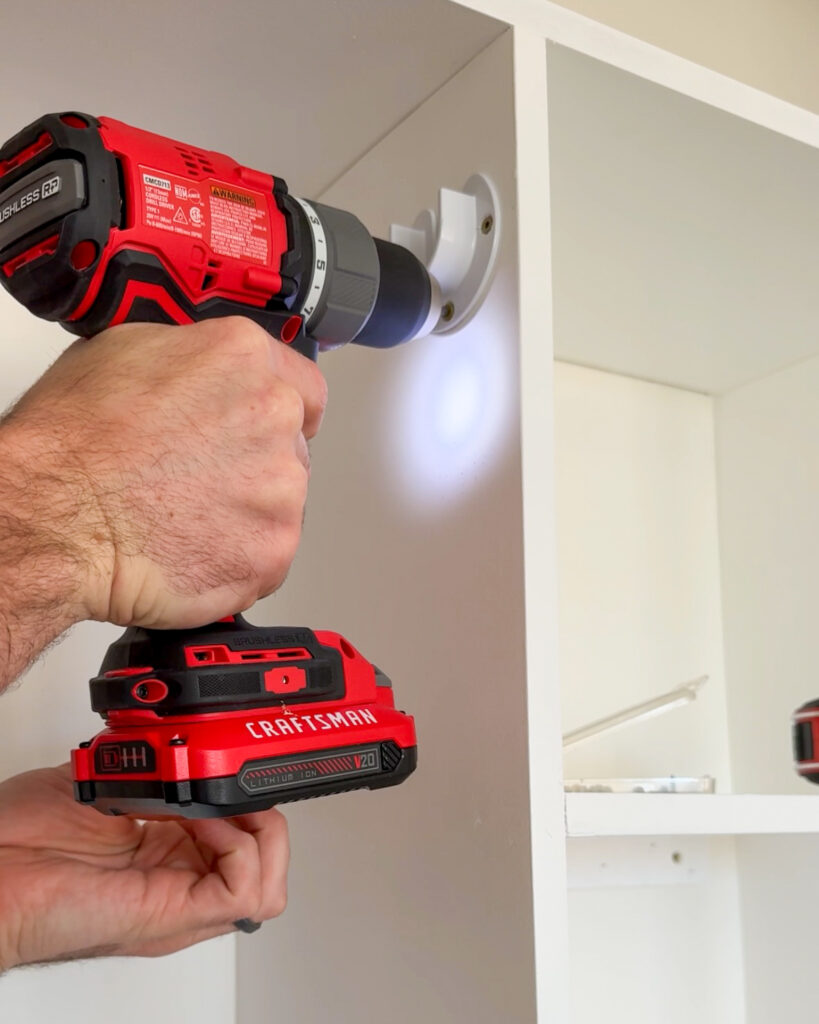
Finally, it was time to install the closet rods. I drilled shallow holes and used ¾” Power Pro screws to secure the rods in place. I chose to use screws instead of anchors for a stronger hold and to make the installation process simpler. The rods were spaced properly and set at the right heights for easy access to clothes.
Organize and Personalize the Closet
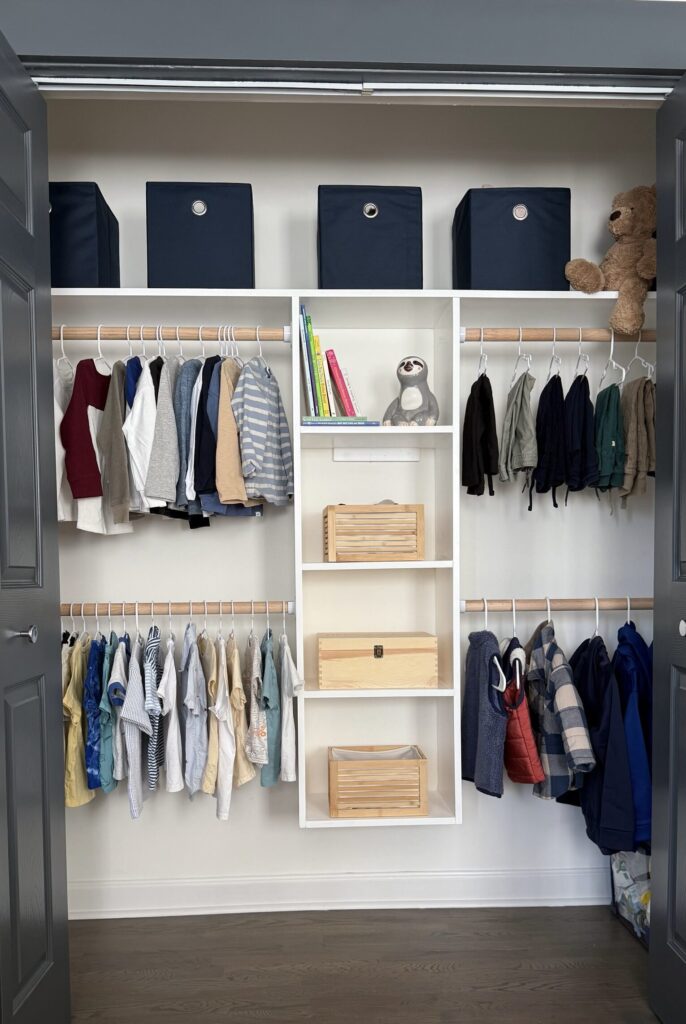
Once the closet was built, it was time to make it his own! Here’s how I personalized it:
- Bins for Toys: I added storage bins to the cubbies to keep things organized.
- Clothes on Rods: I hung his clothes on the rods, sorted by type. Longer wear on top rod and shorter on the bottom rod. I used infant/toddler hangers to keep from stretching his clothes.
- Keepsakes on Shelves: I added a few of his keepsakes to the top shelves to keep them safe.
- Kids Step Stool: This stool will ensure they can reach all their items and help put their belongings away.
TIP: Take your time with measurements and leveling for the best results. With patience and following these 10 easy steps, you can create a closet that’s perfect for your little one!
Building this big boy closet was a rewarding project. With careful planning and attention to detail, I created a space that’s not only functional but also fun and personal for my toddler. Now, he has a closet that he loves—and one that will grow with him as he continues to get older. He’s already enjoying putting his clothes away!!
Comments will load here