
Build a Modern Wood Coffee Table for Your Living Room
If you’ve been wanting to build a DIY coffee table that actually looks custom, this is a great one. It’s a pretty straightforward build, uses basic materials, and the end result feels way more high end than the effort or cost would suggest. The overall size in the guide is about 4′ x 4′, but you can easily adjust it to fit your space. According to your guide, this project is designed to be completed in a few hours with basic tools and beginner-friendly steps. The design is built from dimensional lumber with a slightly distressed finish that works really well in a modern coastal space, but can lean more rustic depending on how you finish it.
Materials
- 2 x 10 x 8 lumber
- Steel angles
- Steel straps
- Pre-stain conditioner
- Polycrylic
- Coarse wire brush
- Mini bucket
- Flat foam brush
- Wood glue
- 220-grit sandpaper
- Bar clamps
- Wood finish stain
- 1-1/2″ galvanized screws
Power Tools

Step 1: Build the Tabletop
Start by cutting your boards down and gluing them together with wood glue to form the tabletop. This step is the foundation of your diy coffee table.
- Work on a flat surface
- Clamp everything tightly
- Let the glue fully cure
If you are new to woodworking, this is a great introduction to DIY furniture building basics.
Tip: If you don’t have long clamps, combine smaller ones to get the same effect .

Step 2: Reinforce with Steel Straps
Flip the tabletop and install galvanized straps underneath.
This step ensures your wood coffee table stays flat and strong over time. You will:
- Space straps about 12 inches from the edge
- Secure with screws across each board
It is a hidden detail that adds long-term durability to your DIY furniture project.

Step 3: Build and Install the Legs
The legs are built by laminating multiple boards together to create a thick, architectural base.
This gives you that chunky modern coffee table look without needing expensive oversized lumber.
Once assembled:
- Attach legs to the underside of the table
- Position just outside the steel straps
This is where your custom coffee table really starts to take shape.

Step 4: Secure the Structure
Install L brackets to lock everything together.
These connect the legs to the tabletop and reinforce the entire build, turning it into a durable handmade wood coffee table that will last.
Be careful with screw length so you do not penetrate the tabletop.

Step 5: Prep for Stain
Before finishing, prep the surface:
- Fill seams with wood glue
- Sand with 220 grit
- Remove dust
If you want a more rustic look, distress the wood using a wire brush or chisel .
This is where you can personalize your DIY rustic coffee table style.


Step 6: Stain and Seal
Apply a pre-stain conditioner, then your stain, and finish with a protective topcoat like polycrylic.
This step transforms your build into a finished living room coffee table that looks store-bought.
Take your time here. The finish defines the final look.

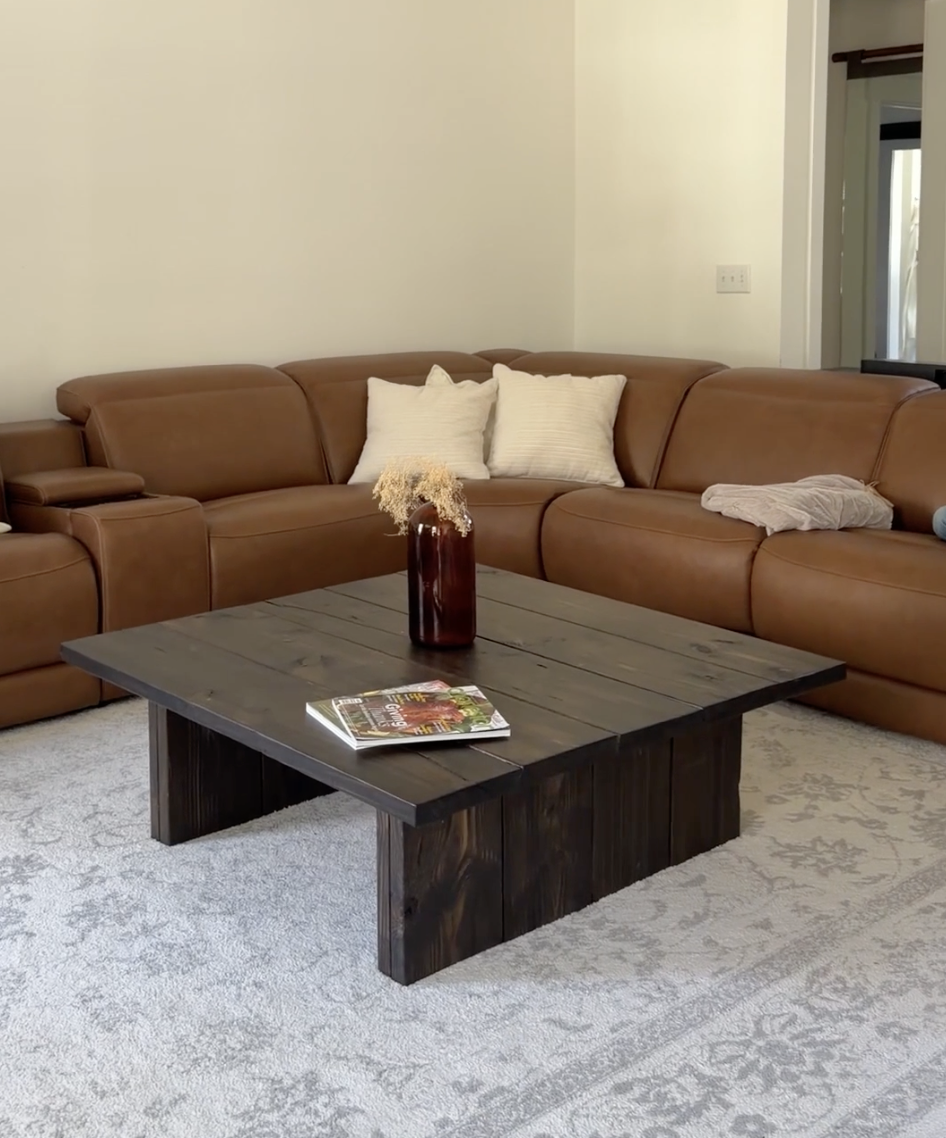
The Final Look
What you end up with is more than just a table.
It becomes the centerpiece of your living room. A place for coffee, books, toys, and everything in between.
Much like a simple outdoor upgrade like a rain chain, this is one of those projects that feels small while you are building it, but completely transforms your space once it is done .
Get the Full DIY Coffee Table Plans
If you want the full step-by-step coffee table plans, including cut lists and diagrams, you can download the complete guide here.

Comments will load here