
Create a Closet with Custom Bench and Storage
If you’ve been wanting to build a DIY coat closet that actually feels built-in and custom, this is a great one. It’s a clean, functional design that instantly upgrades your entryway without overcomplicating the build.
This project combines a bench, cubbies, and a hanging rod into one cohesive system. It’s designed to maximize storage while still feeling intentional and high-end. And the best part, you can knock this out in just a few hours with basic tools.
Whether you’re dealing with a messy entryway, need a drop zone for your kids, or just want a more polished look, this is one of those builds that completely changes how your home functions.
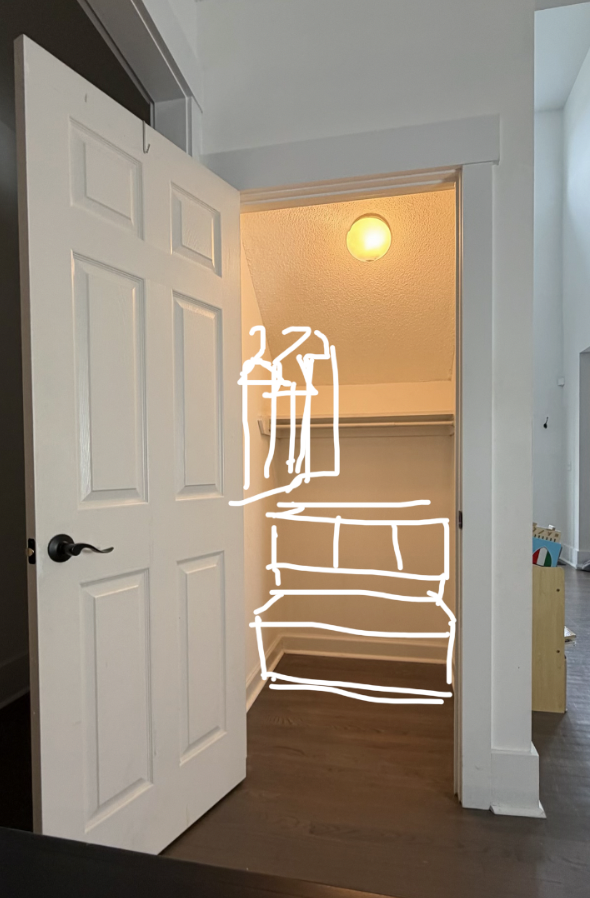
The recommended footprint is around 4 ft by 4 ft, but you can easily adjust the size to fit your space.
Materials
• Trim Puller
• Hammer
• Pry Bar
• Utility Knife
• 1 x 2 x 8 Road Oak Board
• ¾ x 4 x 8 Birch Plywood
• 2 x 4 x 96 Kiln-dried Wood
• Pole Sockets
• Closet Rods
• Wood Glue
• 3 inch Foam
• Fabric
• Adhesive
Power Tools
• Cordless Drill
• Miter Saw
• Circular Saw
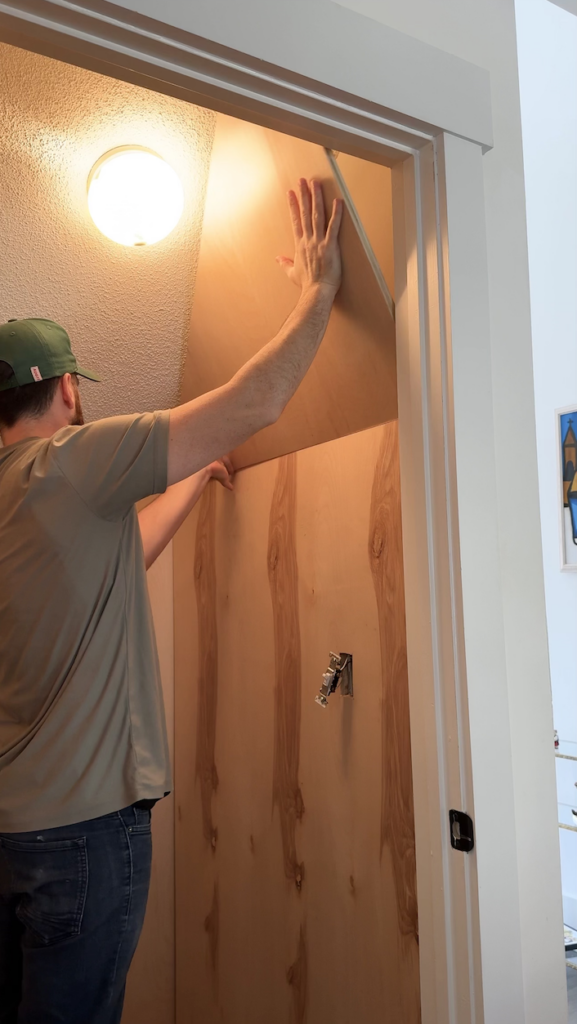
Step 1: Build the Walls
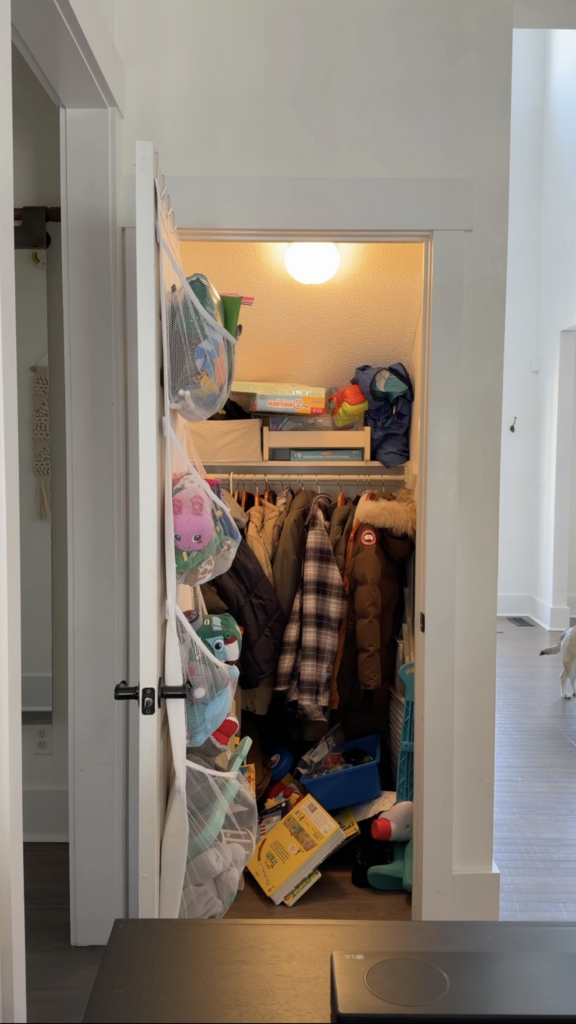
Start by clearing out your closet completely so you’re working with a blank slate.
Cut your plywood panels to fit the back wall and any angled side walls, then install them to create a clean foundation.
What matters here:
- Work with the existing structure (especially if you have angled ceilings)
- Keep everything tight and flush
- Make it feel intentional, not patched together
This step sets the tone for the entire build. If the walls feel clean and built-in, everything else will too.
Tip: Cut each piece, pre-assemble, sand everything down and apply polycrylic before assembling this closet to create a smooth, clean finish.
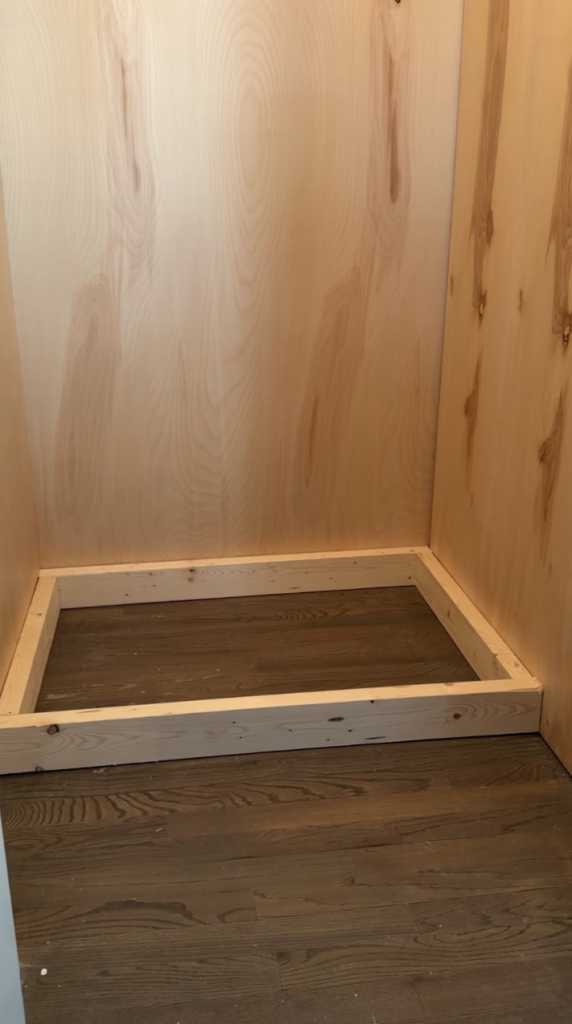
Step 2: Frame the Base
Build a rectangular base platform for your bench area using 2x4s.
Secure the frame to the wall and/or floor so it feels solid and doesn’t move.
Then add a top panel to create the base deck.
Focus on:
- Keeping everything level
- Locking it into place securely
- Matching your final bench footprint
This is the foundation of your entire system.
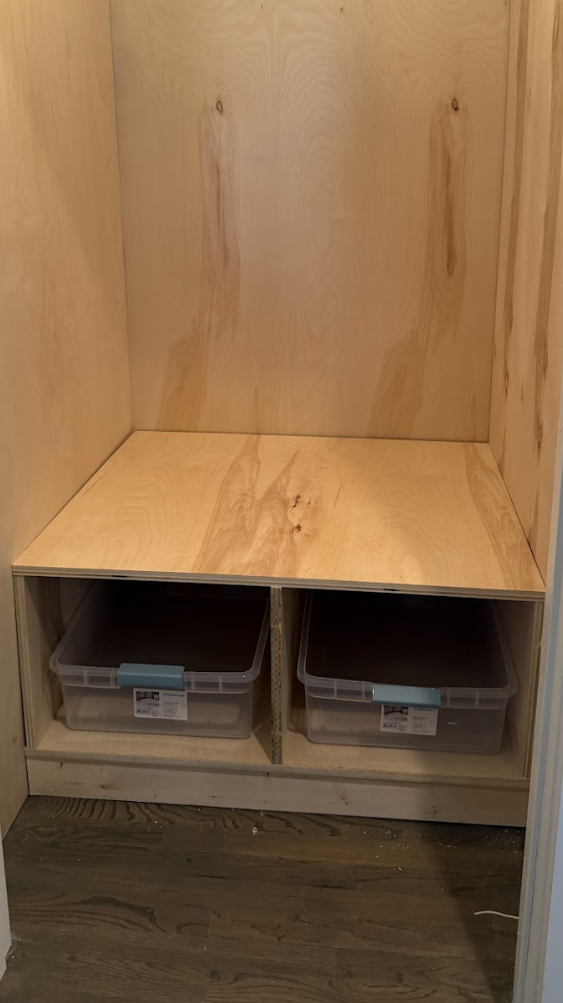
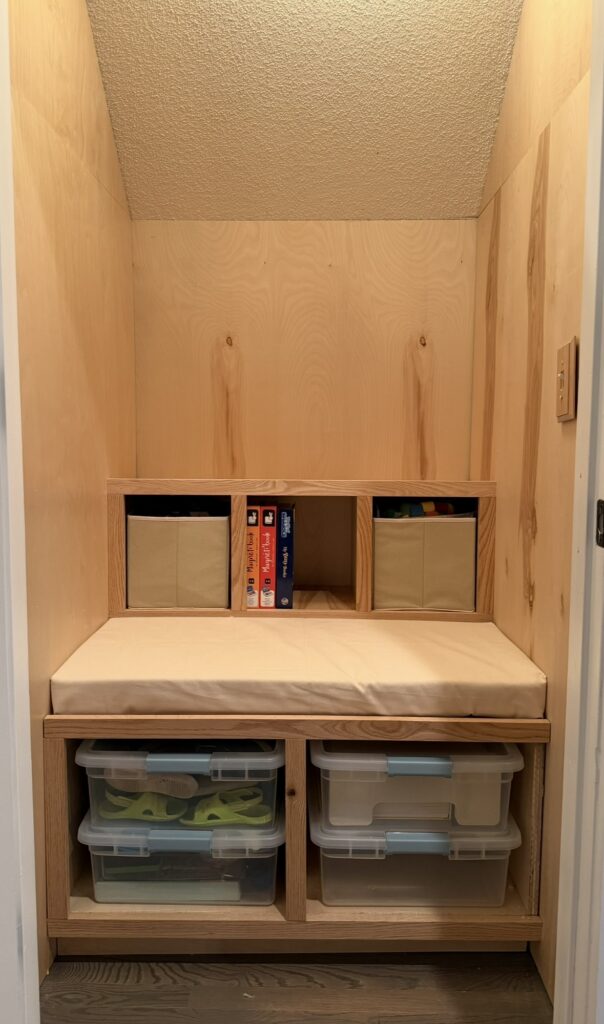
Step 3: Build the Bench
Cut your bench pieces and assemble the main box structure.
Once assembled, fit it directly into the framed base.
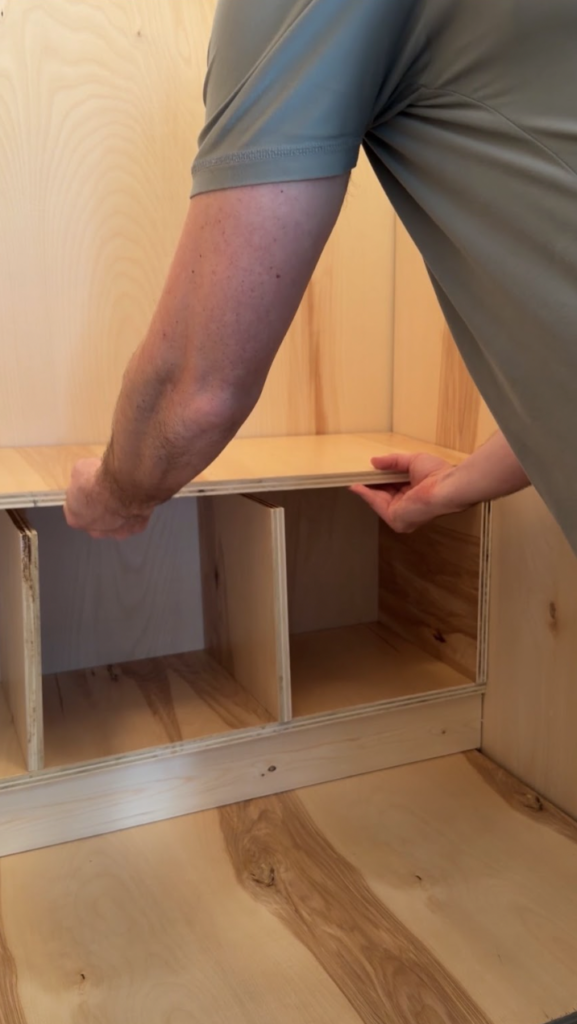
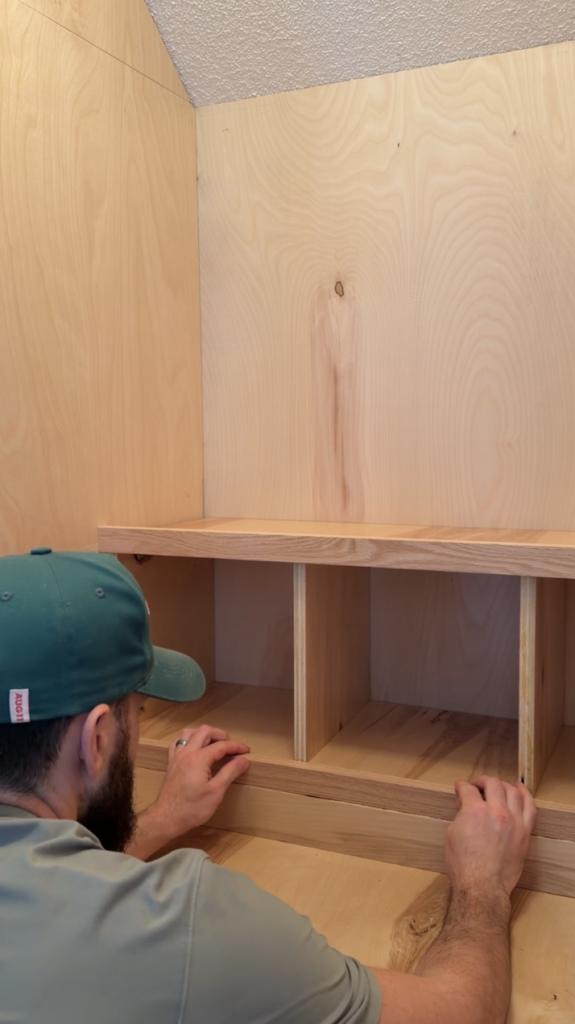
Step 4: Build the Cubbies
Cut your upper shelf and divider pieces.
Install a long shelf across the back wall, then add vertical dividers underneath to create cubby sections.
What makes this look good:
- Even spacing
- Clean cuts
- Consistent sizing for baskets or storage bins
This is where function meets design.
Step 5: Install the Face Frames
Add trim to the front of the bench openings to clean up all the exposed plywood edges.
This step is small but makes a huge difference.
Tip:
Framing the openings is what gives it that “custom built-in” look instead of a DIY box.
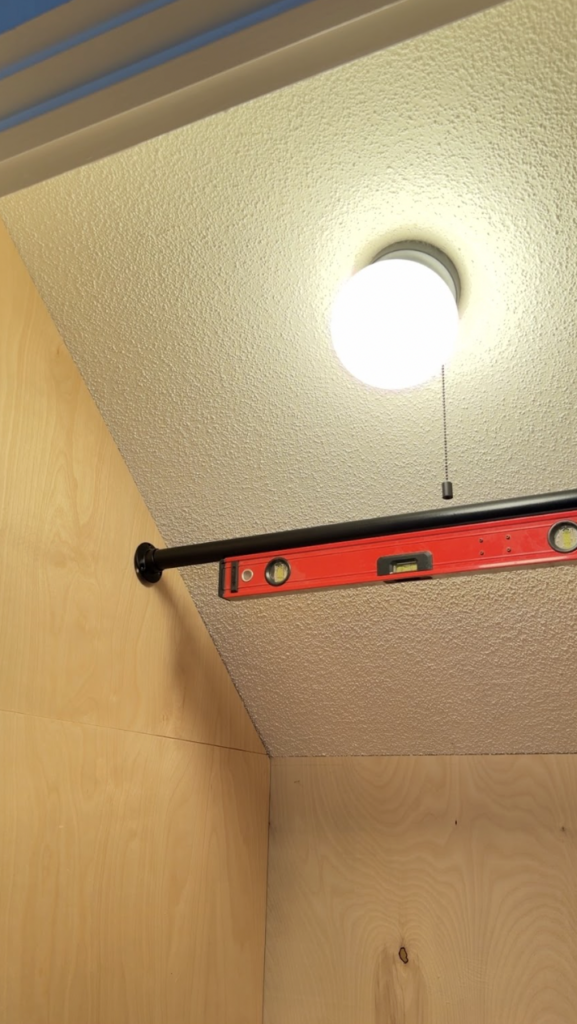
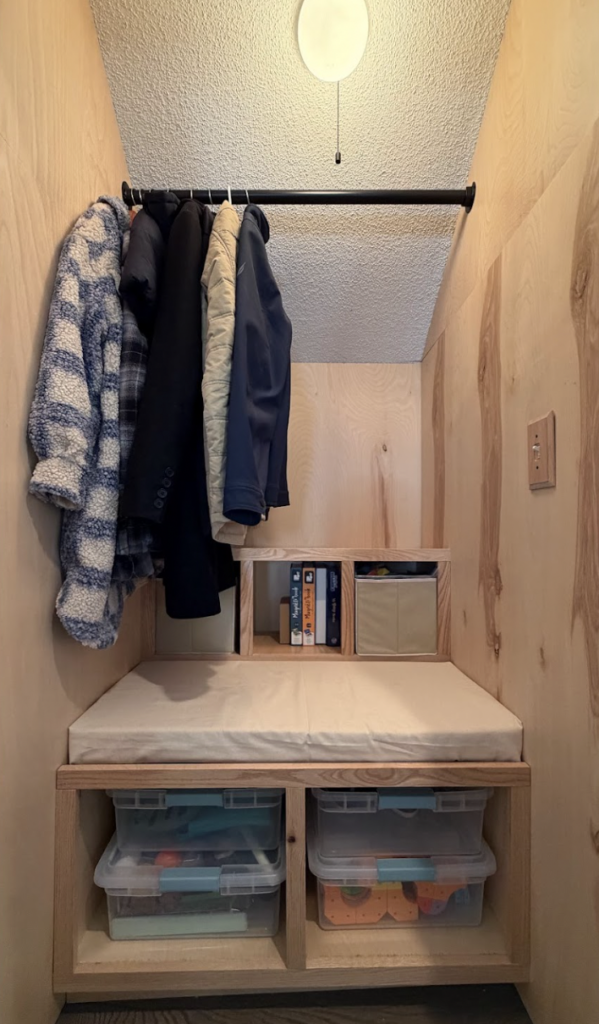
Step 6: Install the Clothing Rod
Mount your closet rod hardware on both side walls and install the rod under the sloped ceiling.
Make sure:
- There’s enough height for hanging coats
- It doesn’t interfere with the cubbies or bench
This adds that final layer of functionality.
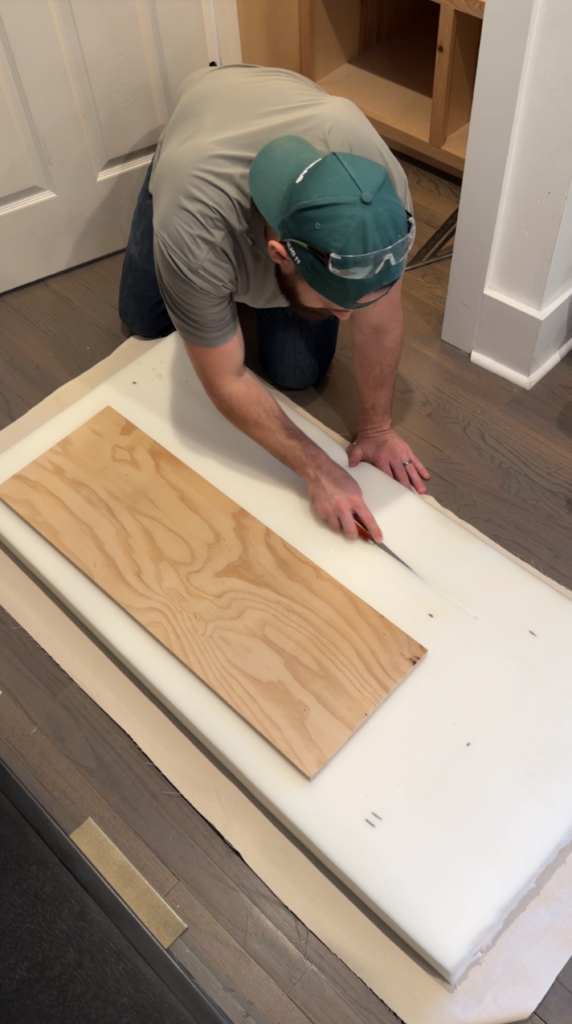
Step 7: Upholster the Bench
Cut foam to fit the bench top, then wrap it with fabric.
Staple everything tightly underneath and place it on top of the bench.
This softens the space and makes it way more usable day to day.
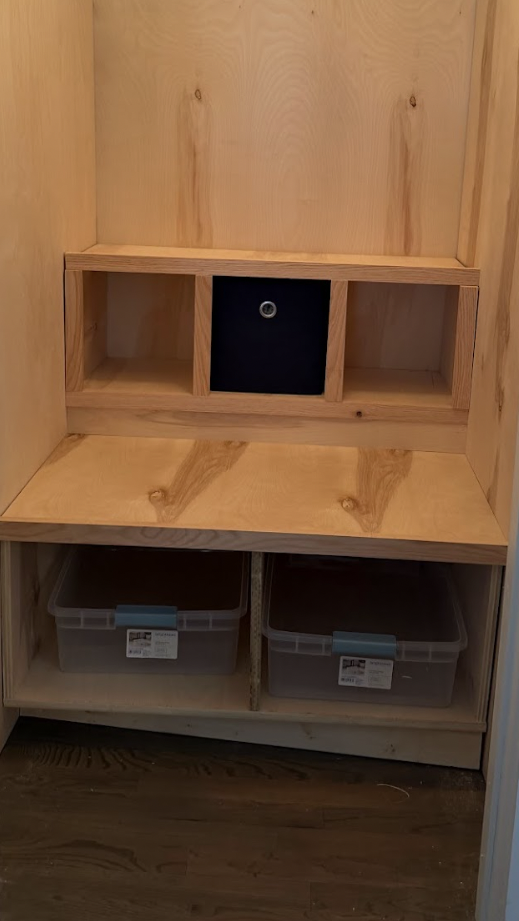
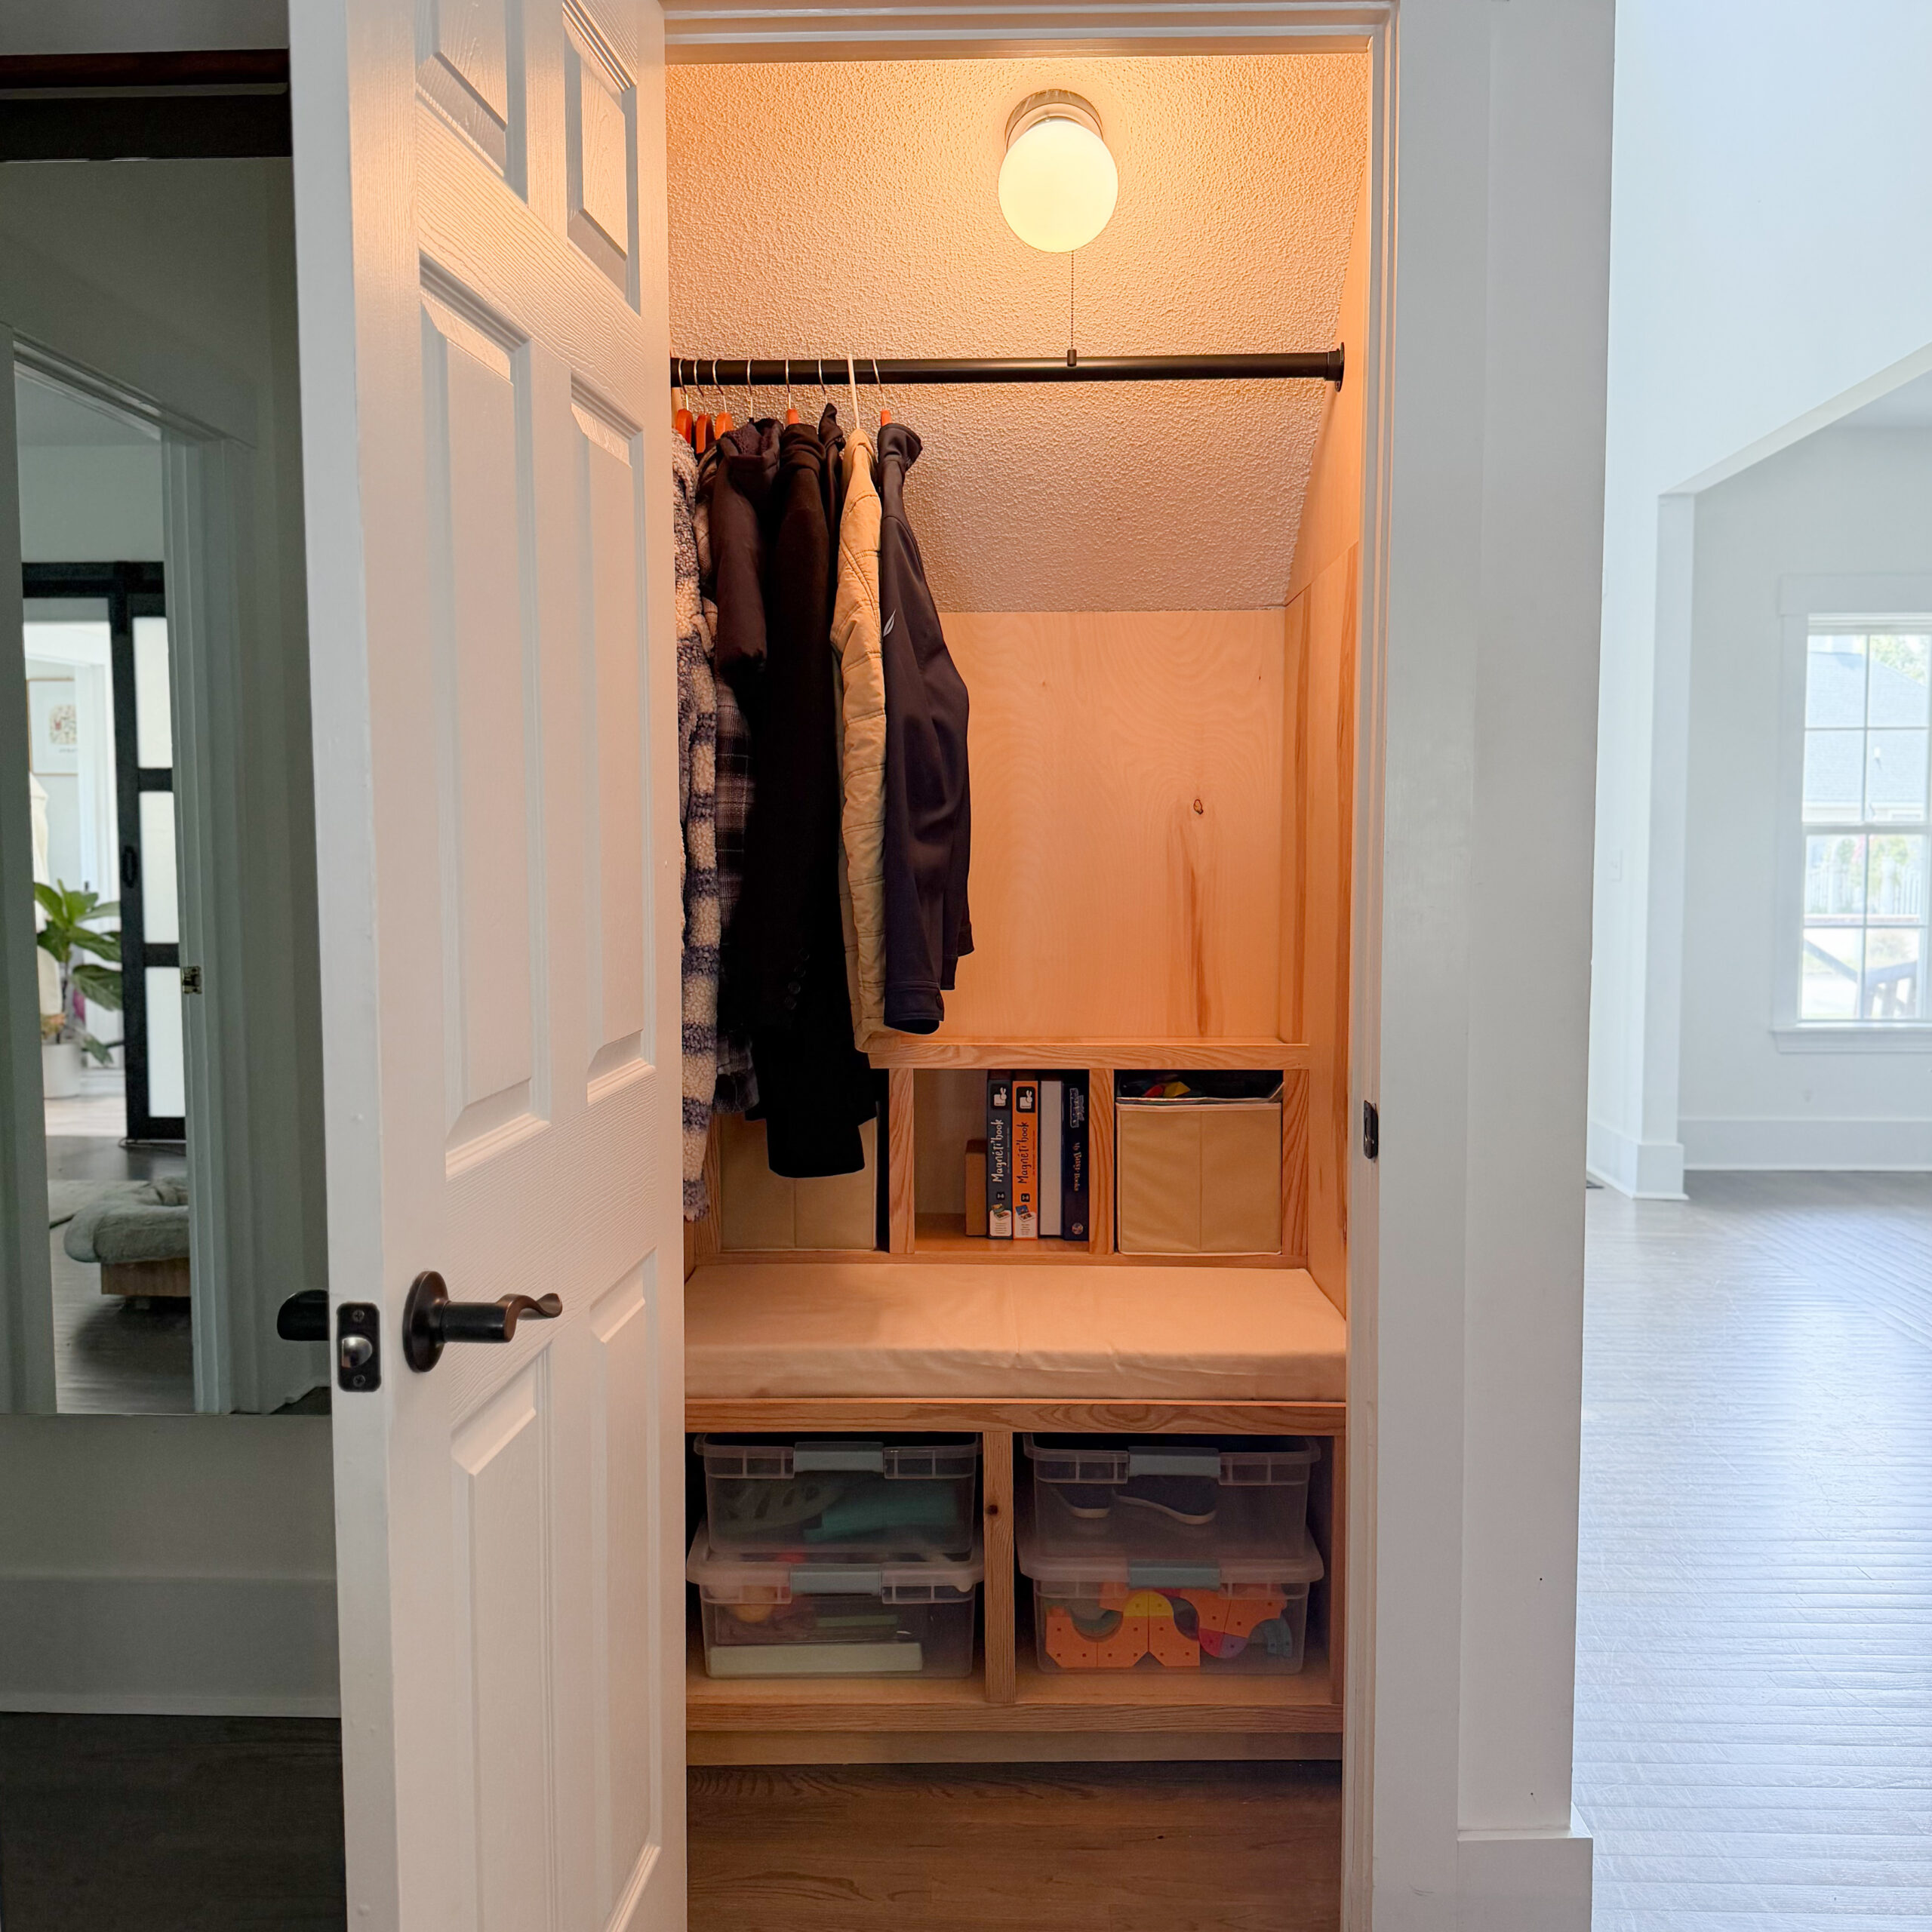
Step 8: Add Storage + Style
Slide storage bins into the lower openings and start using the upper cubbies.
Hang coats, drop bags, throw in shoes.
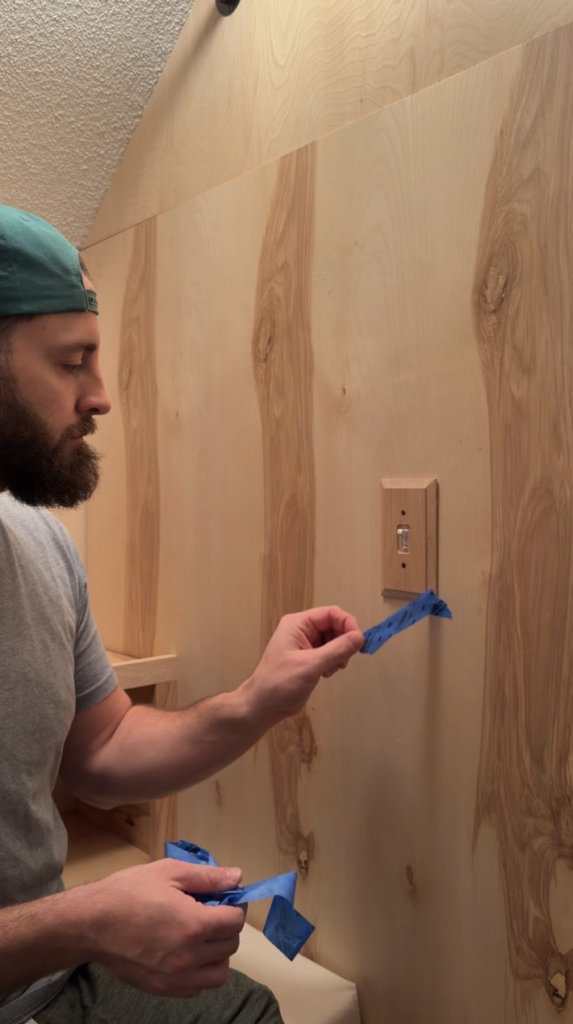
Optional Steps
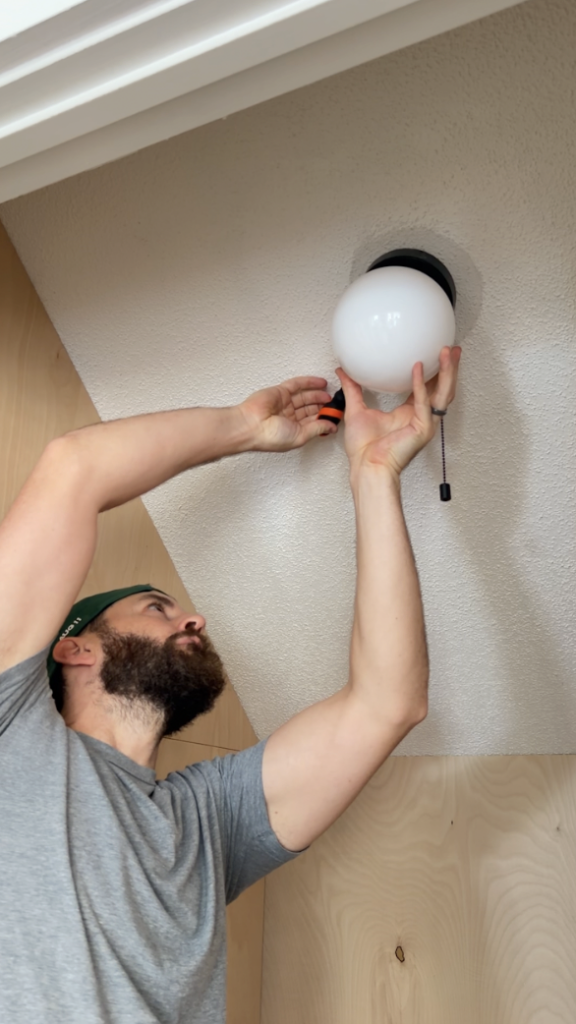
I also swapped in a wooden light switch cover so it blends seamlessly with the overall look, and updated the light fixture.
The Final Look
What you end up with is more than just a coat closet. It’s one of those builds that doesn’t just look good, it actually makes your home work better.
Watch my closet transformation here!

Comments will load here