
I can’t believe I am even saying this but I turned my garage into the ultimate dream garage! My garage slowly turned into more of a storage unit than a workspace, so it was time for a makeover.
Step 1: Plan Ahead
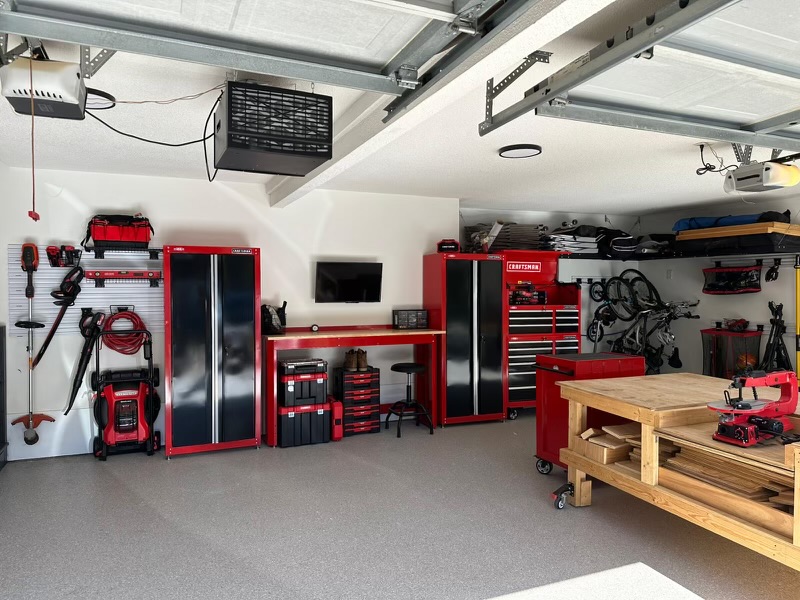
Design your Garage
Create a layout that maximizes functionality, considering options like shelving, cabinets, and workspaces. I always try to think of my past projects and DIY ideas I have for the future. I want a space that will aid towards me getting my projects done efficiently.
Sketch Your Vision: Start with some rough sketches of how you want your garage to look. Consider where you’ll need storage, workspaces, and room for movement.
Use the Configuration Tool: Go to Craftsman.com and input your garage measurements. The tool will help you visualize your layout in 3D, making it easier to plan.
Step 2: Clean It Out
Organize
I started by taking everything out of the garage. I did this to see what I was really working with. Sorted all of my stuff into a pile of keep, give away, and throw out. Jen made a rule that if I haven’t used a tool in a year to get rid of it.
I used clear bins and a label maker to organize all my stuff. I then, proudly, threw out 4 total – heavy duty contractor bags of trash. Next, I went to cleaning. I knew if I didn’t take the time to sweep and wipe away all the dust that I would never do it.
Clean Garage Doors: Spray down the garage doors with a 30 Second Cleaner. Let sit for up to 10 minutes. Then, rinse and dry with microfiber cloths.
Step 3: Update the Floor and Lighting
with Epoxy and LED Lights
Clean the floor thoroughly. Use a floor etcher if needed to create a rough surface for the epoxy.
Once the floor is prepped, apply your epoxy paint. This will protect the concrete and give your garage a fresh look.
Upgrade Garage Lights: Replace old bulbs with new LED fixtures to brighten up the space.
Step 4: Fresh Paint
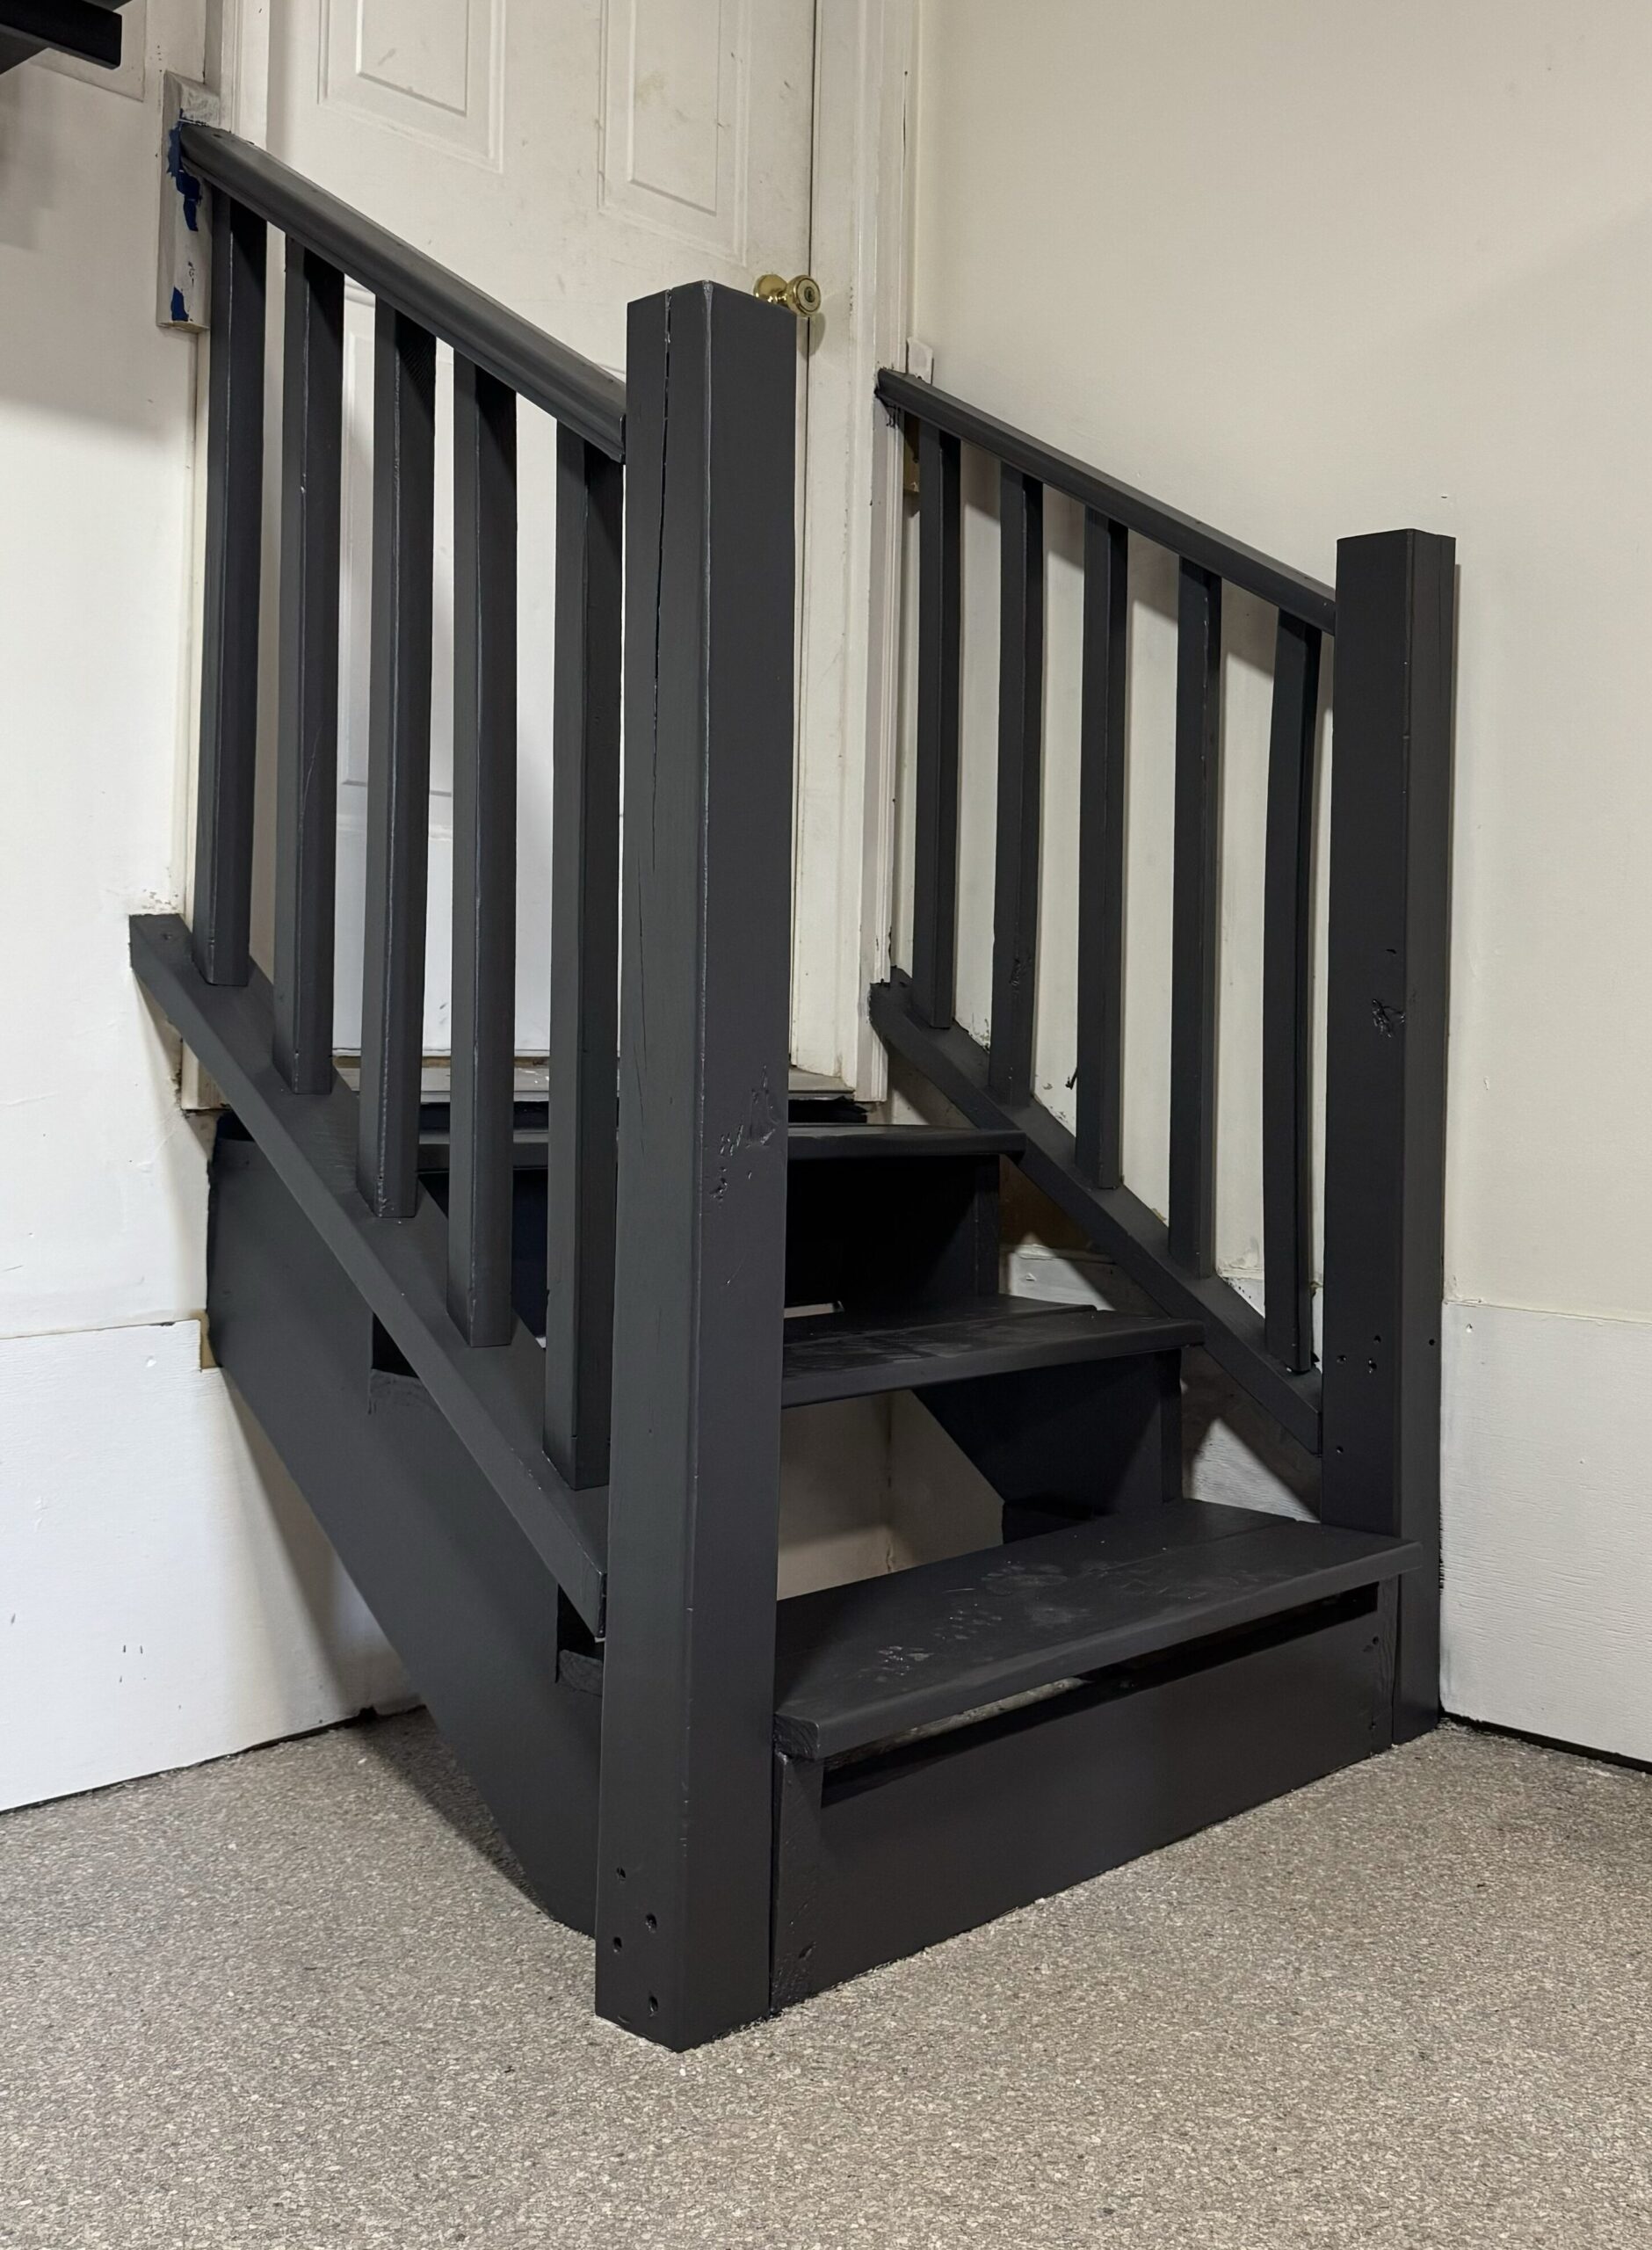
Painting the Stairs
If your garage has stairs, a fresh coat of paint can really spruce things up. I painted mine to aesthetically coordinate with my new garage storage.
Start by cleaning and lightly sanding them for better paint adhesion. Use a small roller, paint a thin layer and let dry before adding a second coat.

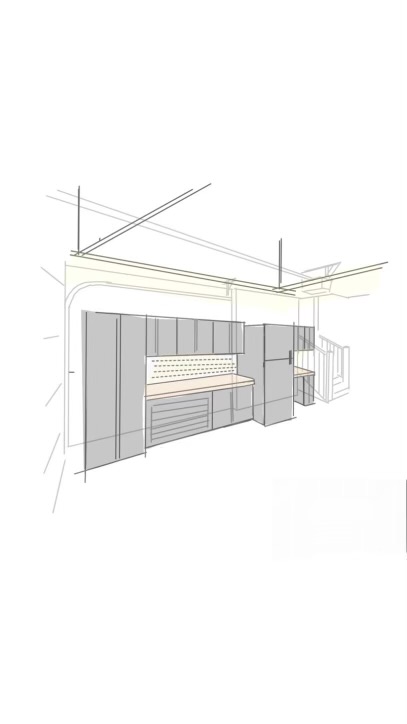
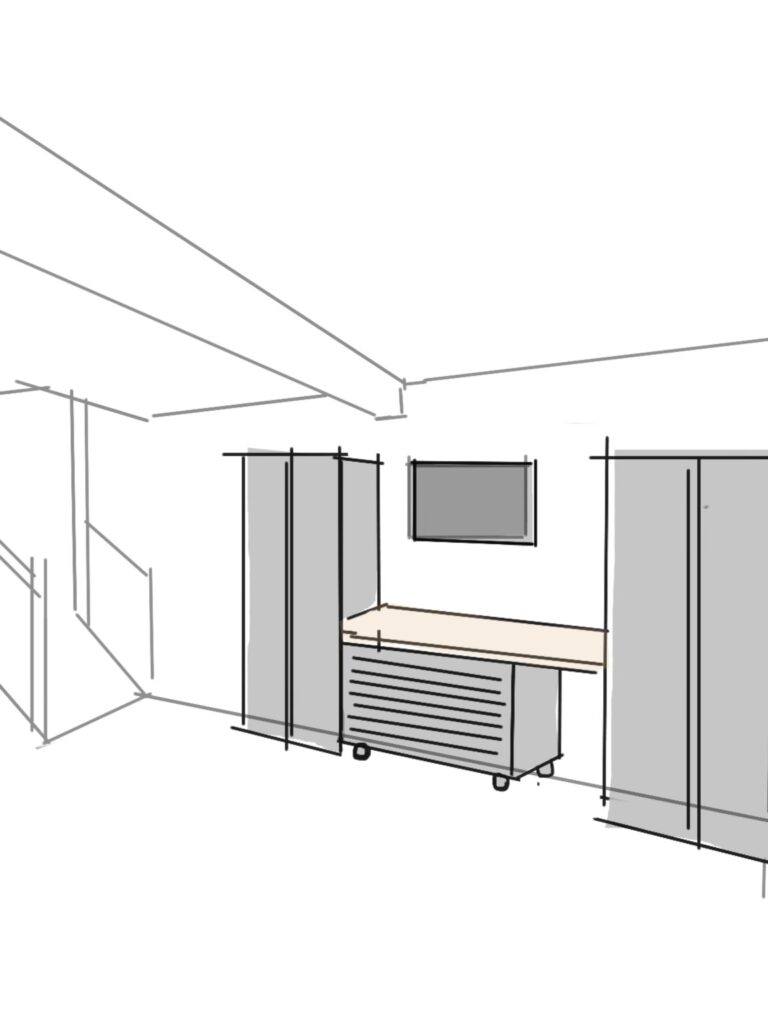
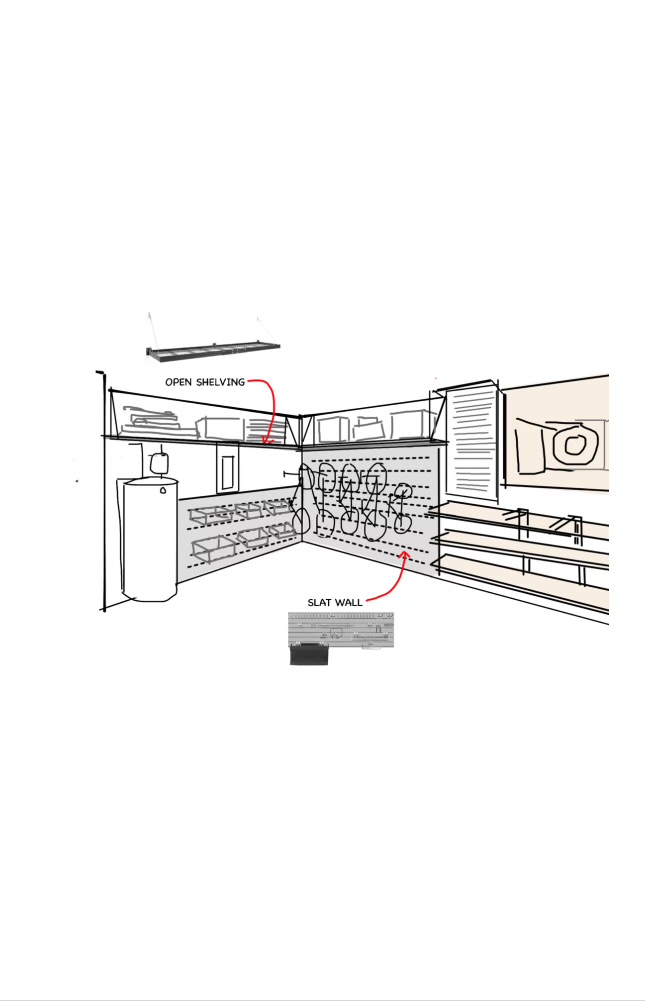
Step 4: Install Wall Storage
VersaTrack System
This VersaTrack wall system has been a game changer. Decide how much wall space you want to cover. Measure the space to ensure the panels will fit. Follow the instructions given on how to add these to the wall. The step-by step guide given was super helpful. It just takes a drill and some screws to get this bad boy mounted. Make sure to use a level when adding. Lastly, Hang up the accessories of hooks, baskets, and shelves to hold all your tools and gear.


Step 5: Install Storage Organization
Workbench and Cabinets
Figure out where you want everything to go. Think about accessibility and workflow before putting together each cabinet. These pieces are not on wheels so they will not be easy to move around your garage once built. The instructions to building each cabinet were super convenient. Took me less than 3 hours to put together two wall cabinets, two tall storage cabinets and a workbench (with the help of my sister).


Step 6: Stock Up
All the Essentials
Let’s get stocked up! Think about the projects you’ll tackle and the basic essentials you will need most. Grab hammers, screwdrivers, measuring tape, and a drill. I am using the VersaTrack system to hold all of my small hand tools and the drawer organizers to keep the tools needed to charge. The storage cabinets also all have locks so this is where I will be keeping my supplies that I want out of reach from my kid.
Tip: Label drawers and containers for quick findings. You’ll thank yourself later!


Enjoy Your New Garage!
And now you have the Ultimate Dream Garage! Now you can tackle DIY projects or just enjoy your organized haven, you’ll love spending time in your new garage.
Paid Partnership by Craftsman

Comments will load here