

A Nursery Room Makeover
It’s so satisfying to peel off painter’s tape and see that clean, sharp line. Seriously, nothing beats it. I’ve dealt with paint bleeding, jagged edges, and I just didn’t have the time to waste fixing little mistakes. Total headache.
But now I’ve got a routine that actually works—simple, quick, and solid every time. I used it to paint our baby girl’s nursery, and it came out looking clean and professional.
Whether it’s a full room refresh or just touching up a few spots, this is how I pulled it off—
Materials:
- ScotchBlueTM PROSharpTM Painter’s Tape
- ScotchBlue™ Original Painter’s Tape
- Scotch® Rough Surface Painter’s Tape
- 3M ™Hand Masker™ M3000 Dispenser
- 3M™ Hand Masker™ Advanced Masking Film
- Coral Dust Paint
- Antique Rose Paint
- Putty Knife
- Paint Roller
- Paint Tray
- Measuring Tape
- Drop Cloths
- Detail Paint Brush
Starting from Scratch
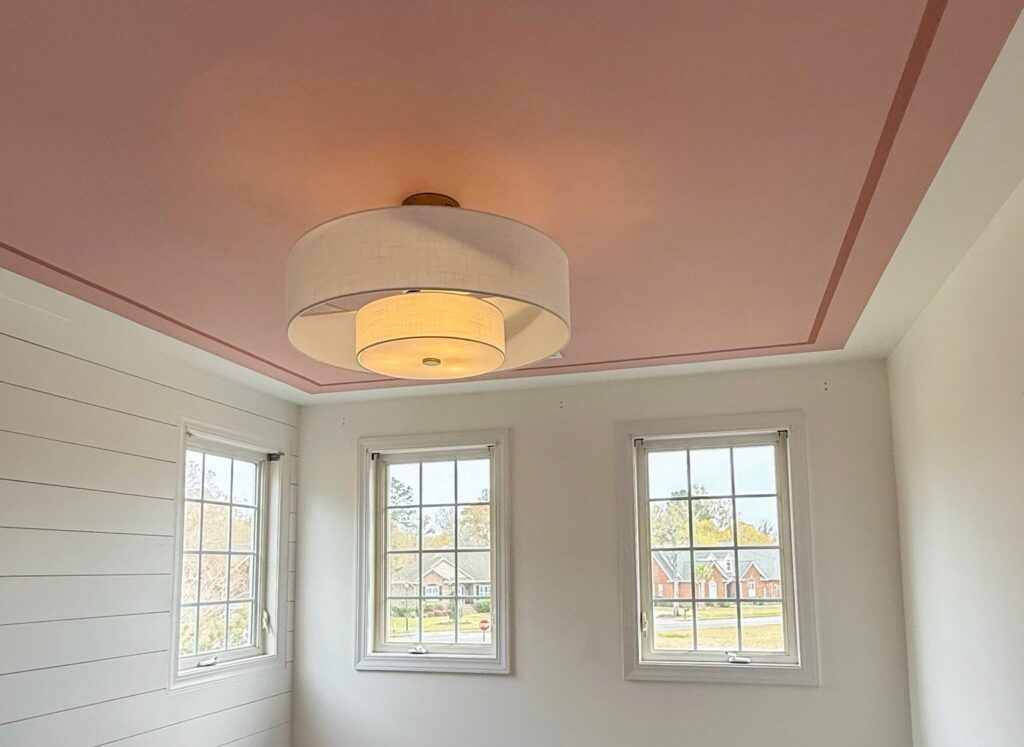
The room was a total blank slate—just plain white walls. I wanted to keep things cozy and soft, so I went with a coral pink ceiling, bright white walls, and a clean stripe of a few shades darker around the frame of the ceiling to add some style to the room.
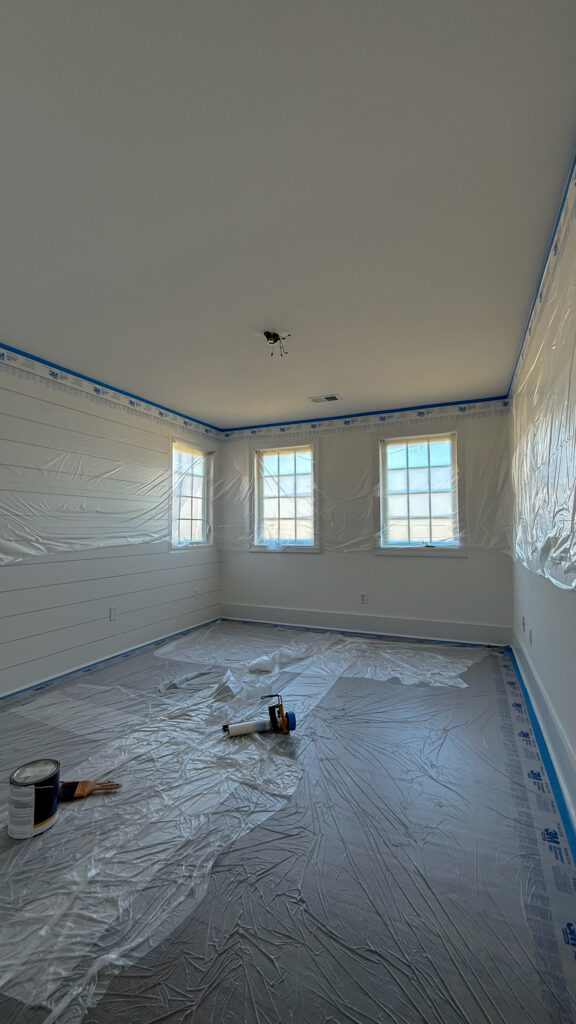
Step 1: Prepping the Room
(Don’t Skip This)
Before I even thought about painting, I cleared everything out of the room and out of the way.
✔️ Wiped down all the walls—dust can really mess with tape sticking properly.
✔️ Masked off the ceiling and floor with 3M™ Hand Masker™—this saved me so much time.
✔️ Used Original Painter’s Tape for sharp lines on edges and corners.
It might feel like a lot, but this prep work makes the painting part so much easier. Doing it right from the start, made the whole process go smooth.
Step 2: Add White Banner to Outer Perimeter
I started with a white “banner” strip around the outer perimeter of the ceiling. I figured it was smarter to go in with the lighter color first than the dark. It’s easier to cover up white paint then it is to cover up dark.
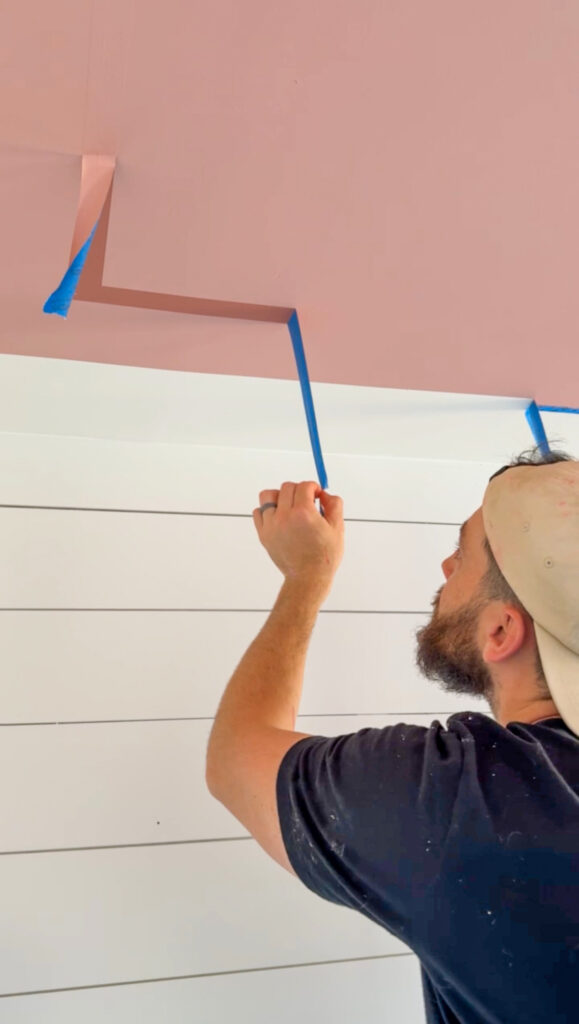
Step 3: Add the Ceiling Frame Accent Color
I started with the darker pink accent color, creating a frame around the ceiling. To keep everything perfectly straight, I used a laser level to mark my lines before painting.
Tip: Let your base coat fully dry for at least 24 hours – it’s recommended that you wait at least 7 days. Oops. before putting any tape over it. I know it’s tempting to move faster, but trust me—this step is worth waiting for.
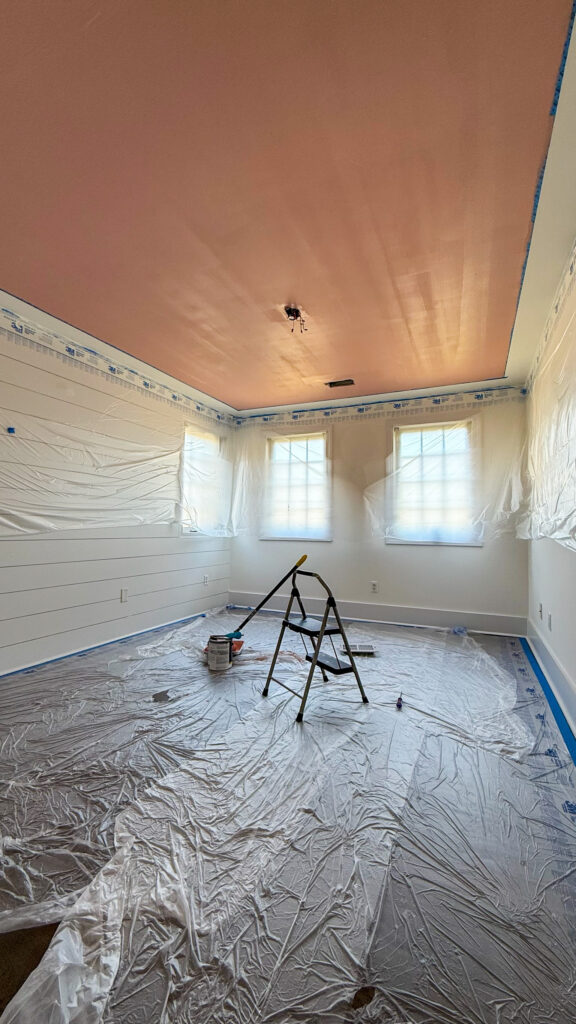
Step 4: Paint Your Base Coat
Once the accent color was fully dry, I moved on to the coral pink base coat for the ceiling. I used a large roller to speed up the painting process.
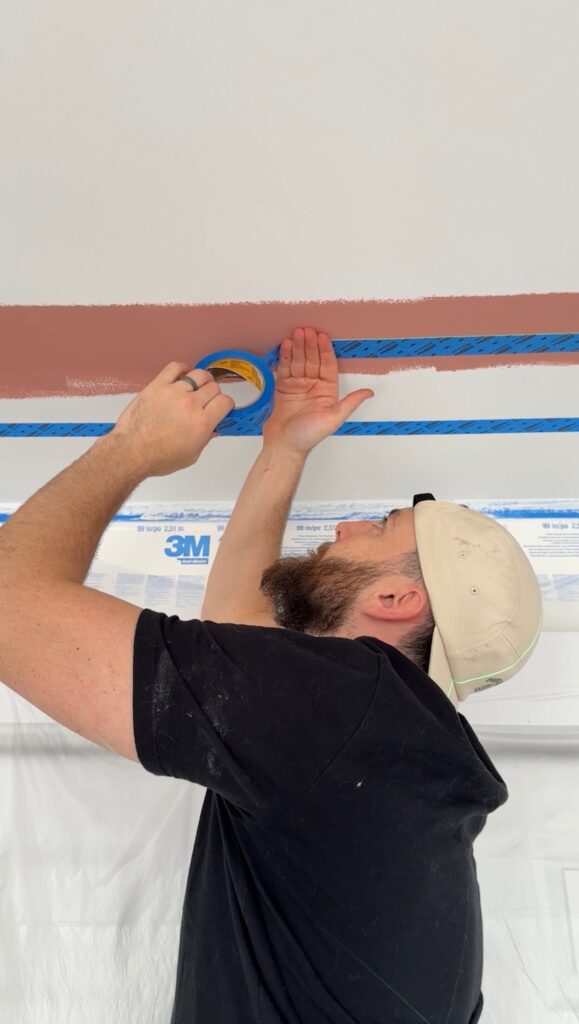
Step 5: Tape It Off Like a Pro
This is where things really start to come together. I measured where I wanted my coral ceiling to stop and the white walls to begin, then applied ScotchBlue™ ProSharp™ right along that line.
Pro tips:
- Press the tape down as you go
- Use a credit card or putty knife to seal those edges—don’t skip this, it makes all the difference
- Let the tape sit for 30 to 60 minutes before painting so it settles properly
A Few Quick Dos and Don’ts:
✅ Wait 24 hours before taping over fresh paint
✅ Make sure walls are clean and dry
✅ Always press tape edges down firmly
✅ Peel the tape off at a 45° angle for best results
❌ Don’t use on unapproved surfaces like wood floors
❌ Don’t leave the tape on for more than 21 days
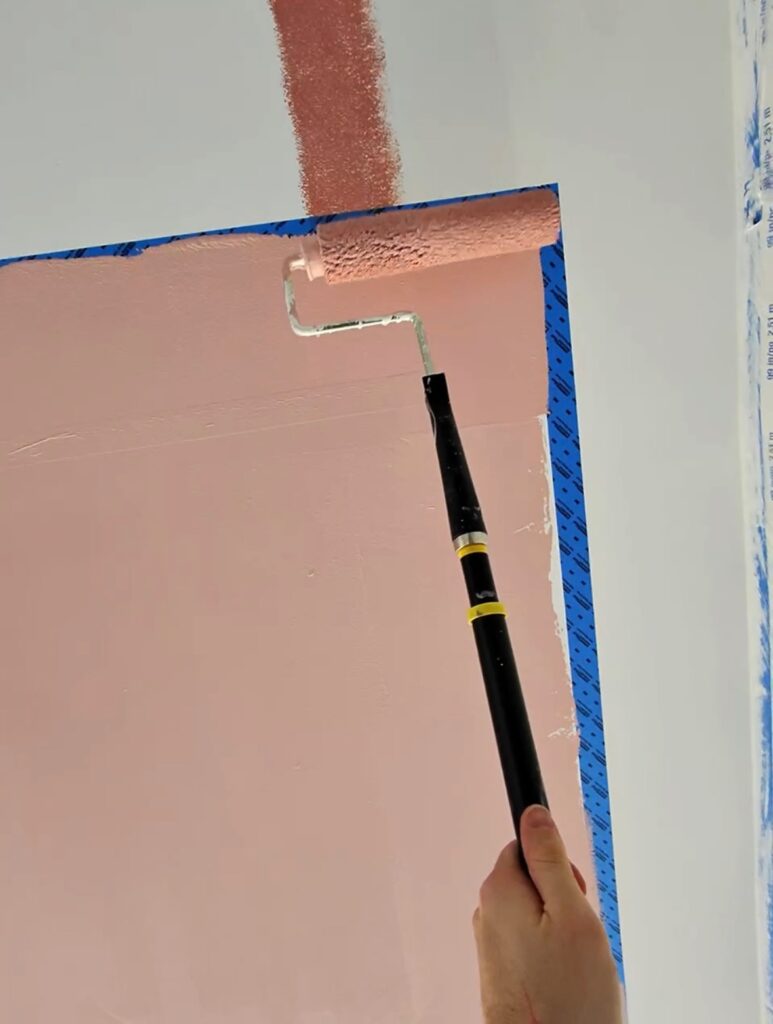
Step 6: Time to Paint!
Now for the fun part. I painted two coats over the taped line—one in each direction for nice, even coverage.
After about 2 hours, the paint was dry to the touch, so I started peeling the tape back slowly at a 90° angle.
And YES. The lines were so clean. Seriously satisfying moment.
Tip: don’t rush and if you have to put at 45* you can also. I got a little cocky and messed up one little corners don’t be like me.
Final Touches
I only had to do the tiniest touch-up with a detail brush, and that was it! The room looks so polished—it honestly feels like a pro came in and did it. But nope, just me and a good game plan. The one corner could do more if wanted to, but even that doesn’t take away from how clean it all turned out.
Let me know if you want it to sound more casual, more polished, or anything in between.
🎥 I’ve got a video showing the whole process—watch the tape peel reveal!
🛒 You can find everything I used linked on my Favorites page.

Comments will load here