

I recently added some security floodlights to my new dream garage to help me feel more secure and keep the place well-lit at night. I went with Wired Floodlights because they’ve got motion detection, high-def video recording, and send alerts to my phone if anything triggers them. Honestly, it just gives me peace of mind knowing my garage is protected, and I can keep an eye on things even when I’m not around. Plus, with everything well-lit and monitored, I can finally enjoy my space without worrying about security.
- Arlo Wired Floodlight – mounting bracket included
- Cordless Drill
- Electrical Wiring Needs
Step 1: Location
Choose Where to Install
First, figure out where you want to mount the floodlight. A common spot is right above your garage door or near the top center. Just make sure it’s close to an electrical outlet, and that it’ll light up the area you want it to cover.
Step 2: Mount the Bracket
Structure for the Lights
Grab a pencil and mark where you’ll drill the holes for the mounting bracket on your garage wall. Then, drill the holes (make sure they’re the right size for the screws and anchors that came with your floodlight). Use a cordless drill to screw the bracket into place, making sure it’s nice and secure.

Step 3: Prepare the Electrical Wiring
Old or New
If you’re replacing an old light, make sure to turn off the power at the circuit breaker before you do anything electrical (safety first!). For a new setup, you might need to call in an electrician to run a line to the spot where you want the floodlight. Once you’ve got access to the wiring, strip a little bit of the insulation off each wire (usually black for live, white for neutral, and green for ground). Then connect them to the right terminals on the floodlight, making sure everything’s tight and secure.
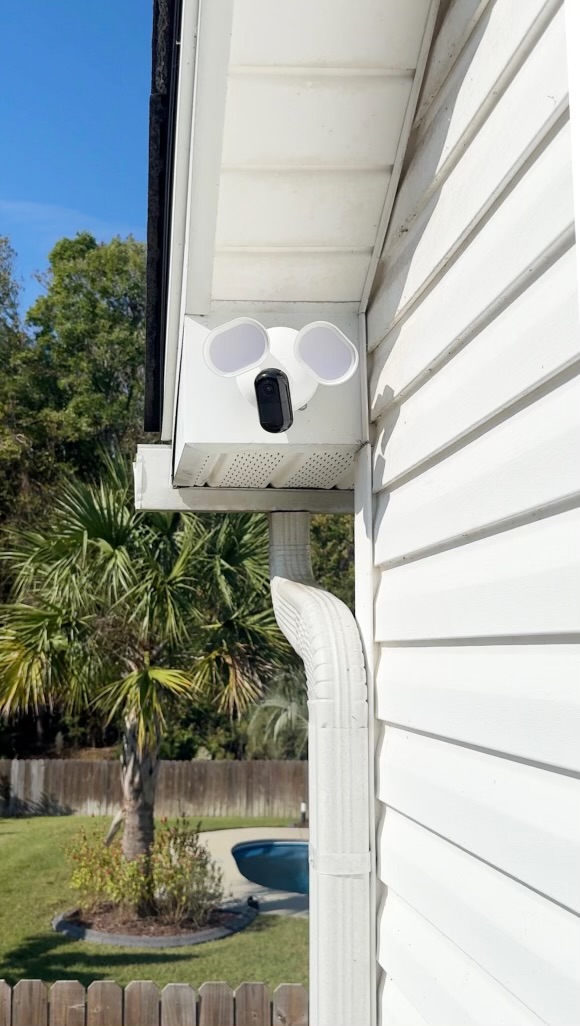
Step 4: Attach the Floodlight
Adding to the Bracket
With the wiring hooked up, carefully mount the Arlo Wired Floodlight onto the bracket. Make sure it’s aligned correctly and securely fastened so it doesn’t go anywhere.

Step 5: Install the Smart Features
App Installation
Now that the light’s up, open the app and follow the instructions to get the smart features going. This is where you can set things like motion detection, alerts, and sync it with other smart devices. You’ll also be able to tweak settings like brightness, motion sensitivity, and schedules right from the app.

Step 7: Final Adjustments
Turn the Power Back On
Once everything’s connected and powered back on, make sure the floodlight turns on as expected. Test the motion detection to check that it picks up movement in the right spots. If needed, adjust the angle or tweak the settings a bit until it’s just right.
With everything installed, you now have fully functional garage security!

Check out the step-by-step process of this latest DIY project on my Instagram page!

Comments will load here