
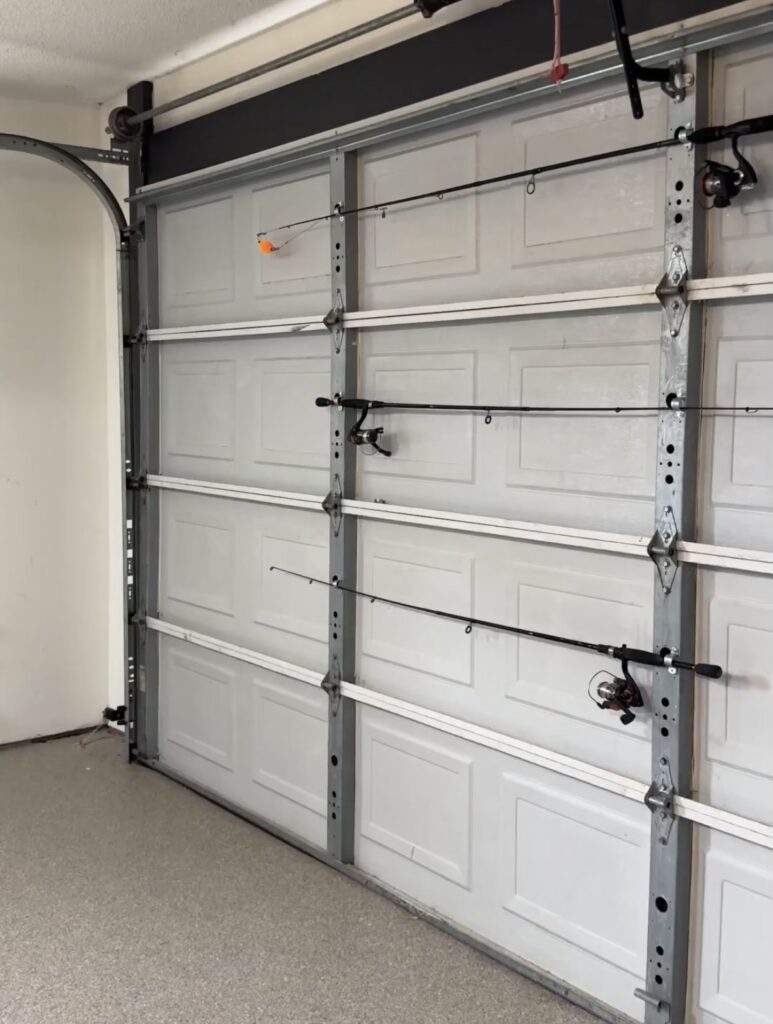
Discover how you can upgrade your garage by adding fishing poles to moving garage doors, creating a fun storage solution that maximizes space and keeps gear organized and protected.
I was looking for a creative way to maximize storage space in my garage while keeping my fishing gear organized, and this DIY project was just what I needed! By mounting my fishing poles on the moving garage doors, I could free up valuable floor space and ensure my equipment was easily accessible and protected from damage. It felt great to take control of my clutter in a more efficient way. Plus, this solution not only looks neat but also adds a personal creative touch to my garage. Follow these simple steps to transform your garage into a more functional and organized space.
- Metal Galvanized Straps
- Cordless Drill
- Drill Bits
- Self Tapping Screws
- Nut Driver
- Measuring Tape
- Level
Step 1: Measure and Plan
Determining the Height and Width
Determine the height and width of the tracks where you’ll mount the hooks or brackets. Ensure they’re evenly spaced to hold the fishing poles securely. Decide where on the track you want the hooks. Typically, placing them at least 18-24 inches apart will allow you to hang multiple poles without them interfering with each other.
Step 2: Install Hooks
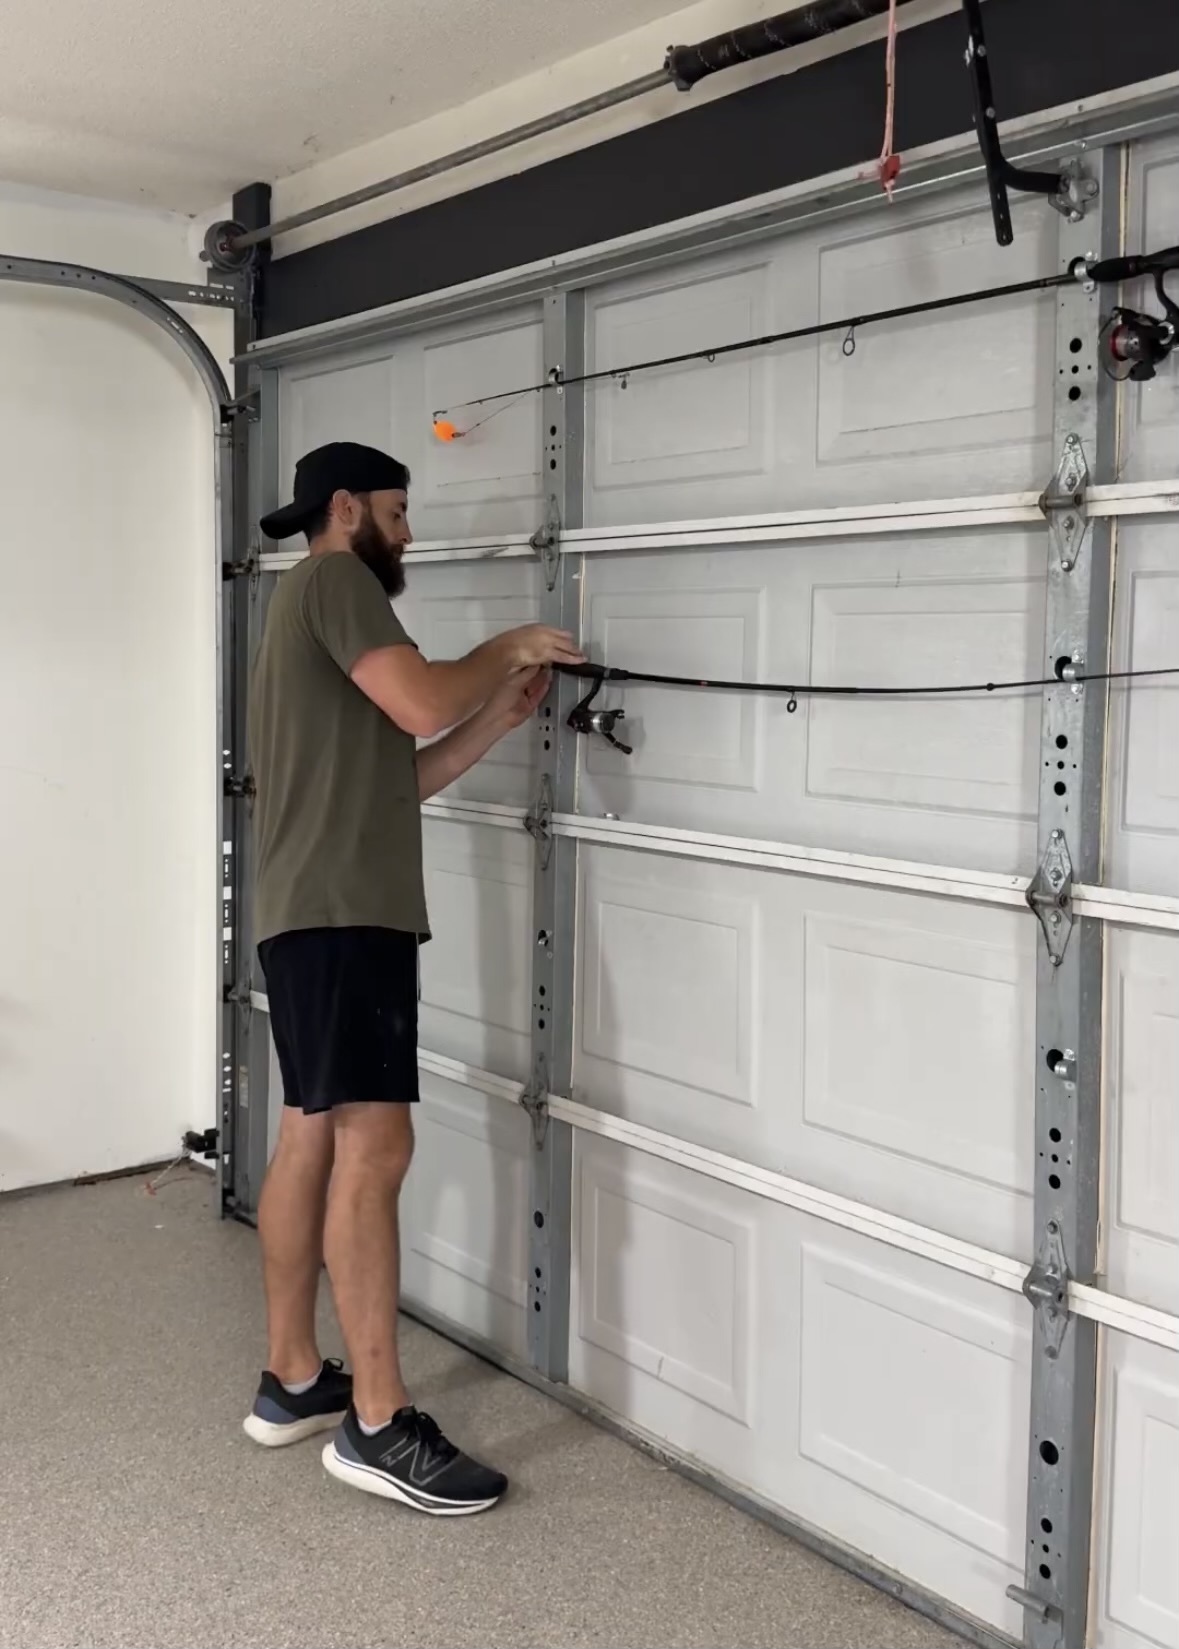
Selecting the Right Hooks and Screws
Choose hooks that will hold the correct sized hooks. I went with ½ inch galvanized hooks. Attach the hooks or clamps to the garage door tracks. Some hooks may come with screws, I used self tapping screws and a cordless drill to secure them in place. Ensure they’re firmly attached and level.
Step 3: Hang Fishing Poles
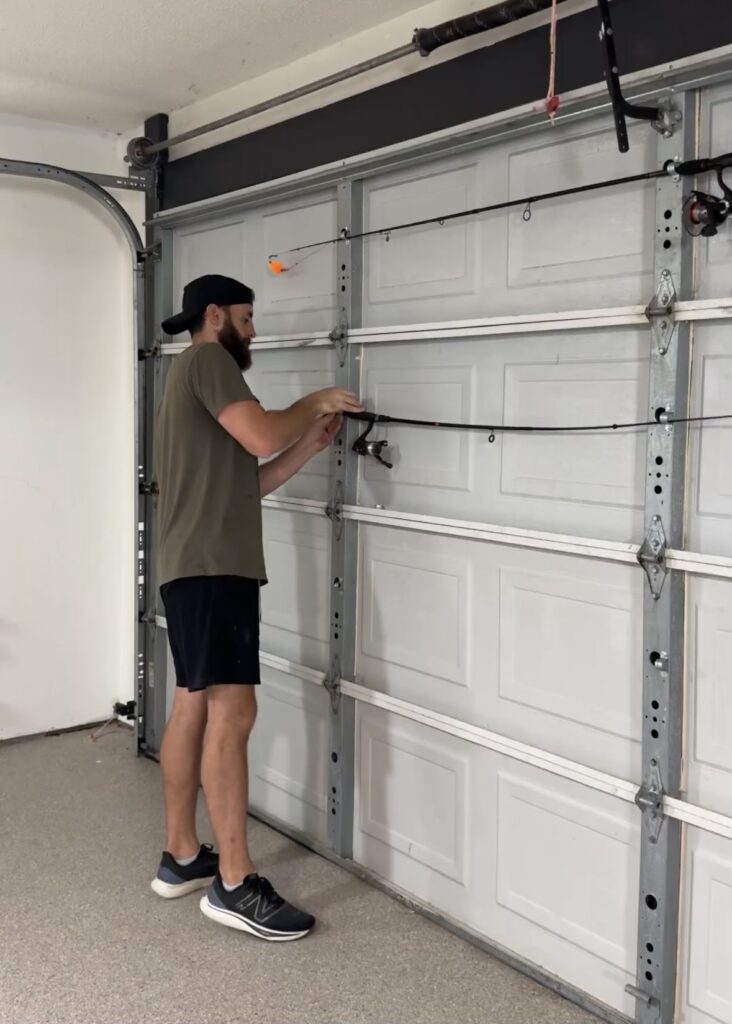
The Fun Part!
Before placing your fishing poles, check that the hooks or brackets are aligned and securely mounted by opening and closing your garage doors a couple of times. Place your fishing poles on the hooks or clamps. Make sure they’re balanced and not touching any moving parts of the garage door.
Step 4: Test the Garage Door
Operating Smoothly
Test the garage door to ensure that it operates smoothly with the fishing poles in place. Run the garage doors open and close a few times. Watch for any interference between the poles and the door’s moving parts. If you notice any issues with the door’s movement or the poles’ placement, adjust accordingly.
With these steps, your fishing poles will be neatly stored and readily accessible, making your garage both more functional and organized. Enjoy your newly optimized storage space!
Check out the step-by-step process of this latest DIY project on my Instagram page!
Follow along for tips, tricks, and inspiration to create your own masterpiece.

Comments will load here