
Build a DIY Outdoor Dining Cedar Table
If you’ve looked at outdoor dining tables recently, you already know they can cost $5,000+. I wanted something oversized, clean, and built for hosting, so I decided to build one myself.
This design is simple but intentional. It’s a large-format table made from cedar that’s meant to live outside, handle the elements, and still look good doing it. The proportions are based on my space, but you can easily adjust the size to fit your setup.
This is one of those builds that doesn’t just look good, it completely upgrades how you use your backyard.
The recommended length is around 10 ft, but feel free to scale it depending on your space.
Materials
• 2 x 6 x 10 Cedar Board (Qty. 11)
• 2 x 6 x 8 Cedar Board (Qty. 1)
• 6 x 6 x 10 Cedar Board (Qty. 1)
• Clamps
• Wood Chisel Set
• Stain Pad + Extension Pole
• Exterior Wood Stain (I used Cabot – Acorn)
• Wood Glue
• Wood Screws
• Sandpaper (80, 120, 150, 220 grit)
Power Tools
• Cordless Drill
• Miter Saw
• Circular Saw
• Palm Sander
• Oscillating Tool
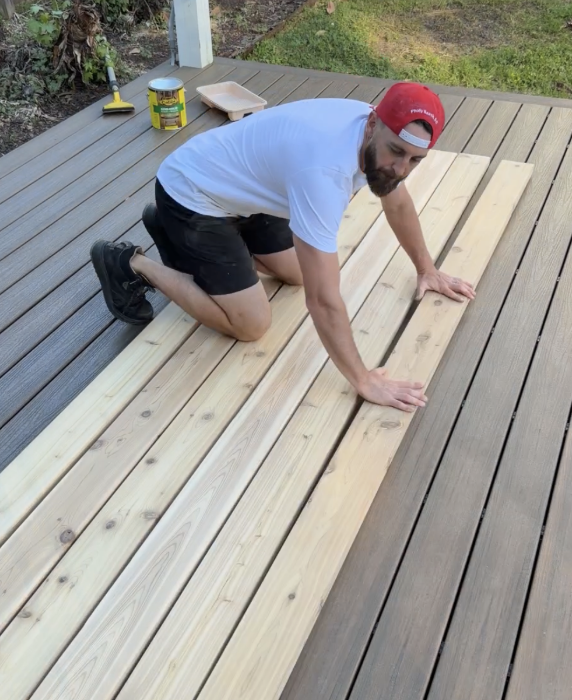
Step 1: Build the Tabletop
Trim 2×6 boards on each side (± 1/4″) to clean up end grain
Remove rough ends of wood
Final tabletop length should be ~120”
Arrange boards in an alternating smile / frown grain pattern
Tip:
Plan your layout so the grain and color look intentional
Pro Tip:
Cut boards together using a miter saw or circular saw to keep everything consistent
Step 2: Sand and Prep
Before assembly, prep everything.
Sand in stages:
- 80 grit → remove imperfections
- 120 grit → smooth
- 220 grit → finish
Focus on:
- Slightly rounding edges
- Cleaning up knots
- Wiping all dust before moving on
This is what makes it feel like a finished piece, not a raw build.
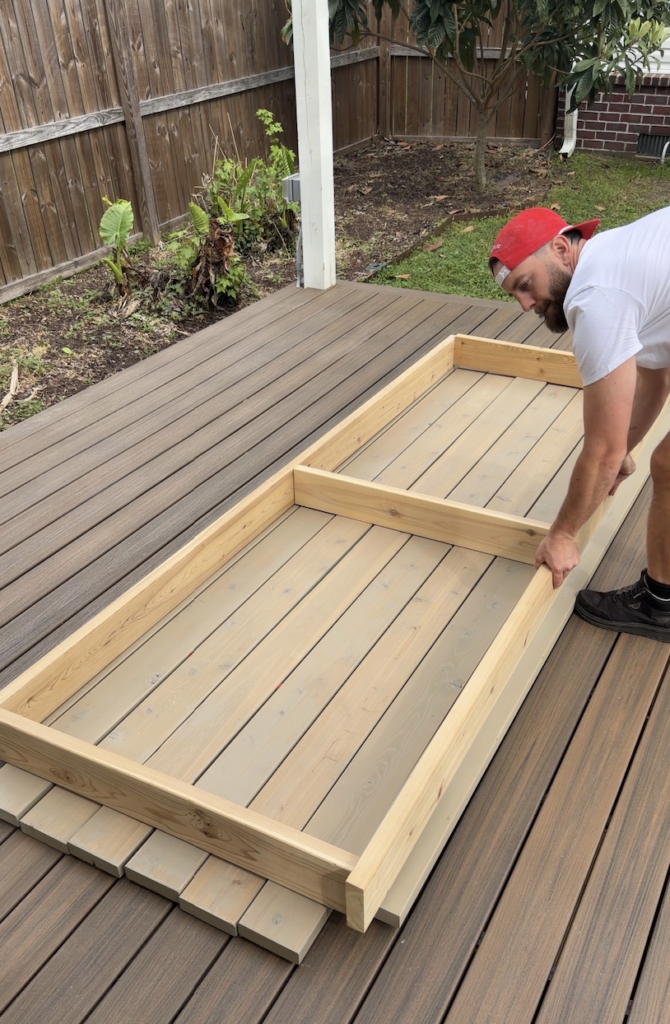
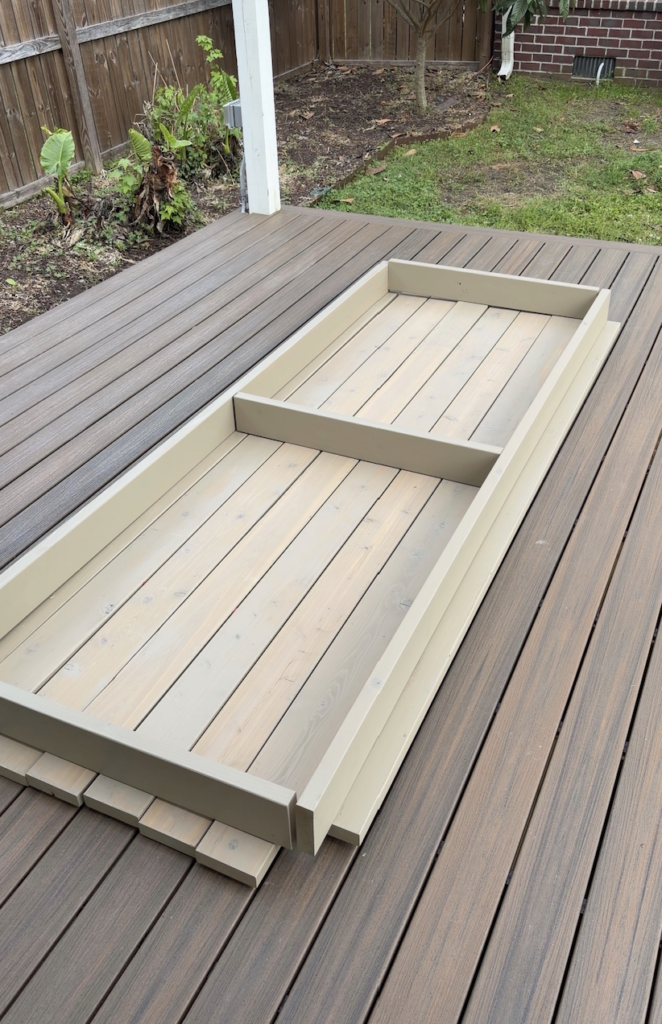
Step 3: Build the Frame
Flip the tabletop upside down.
Build your support frame underneath, inset slightly from the edges.
Final frame length: ~109 inches
Secure using:
- Wood glue
- Screws
Focus on:
- Keeping everything square
- Locking joints tight
- Eliminating movement
This is your structure. Don’t rush it.

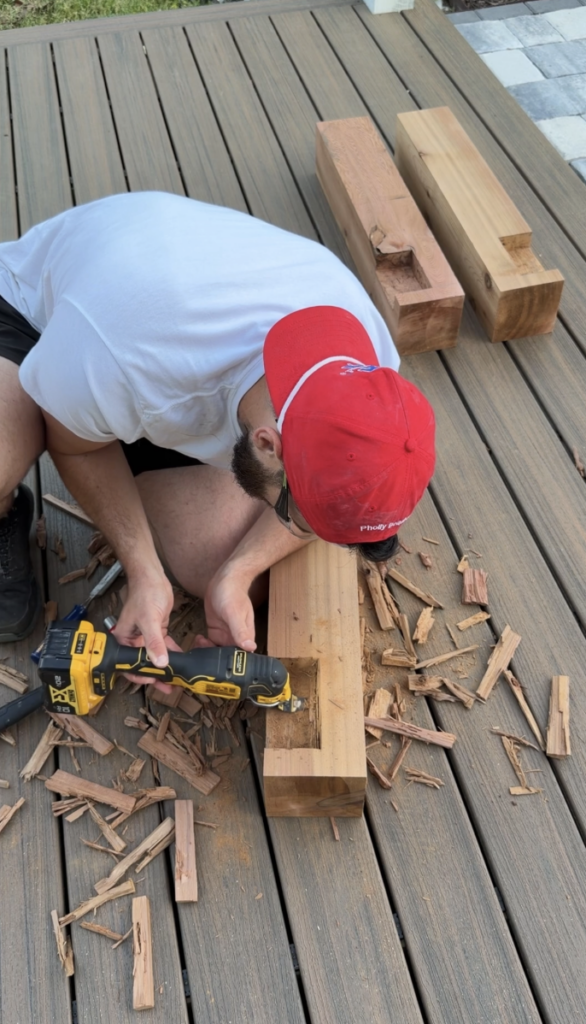
Step 4: Cut and Notch the Legs
Cut your 6×6 into four 30-inch legs.
Then notch each leg so the frame sits inside it.
Use:
- Oscillating tool
- Wood chisel
What matters:
- Clean, sharp edges
- Slow controlled cuts
- Consistency across all legs
Tip: You may need to start your cut on one side and flip the piece to finish.
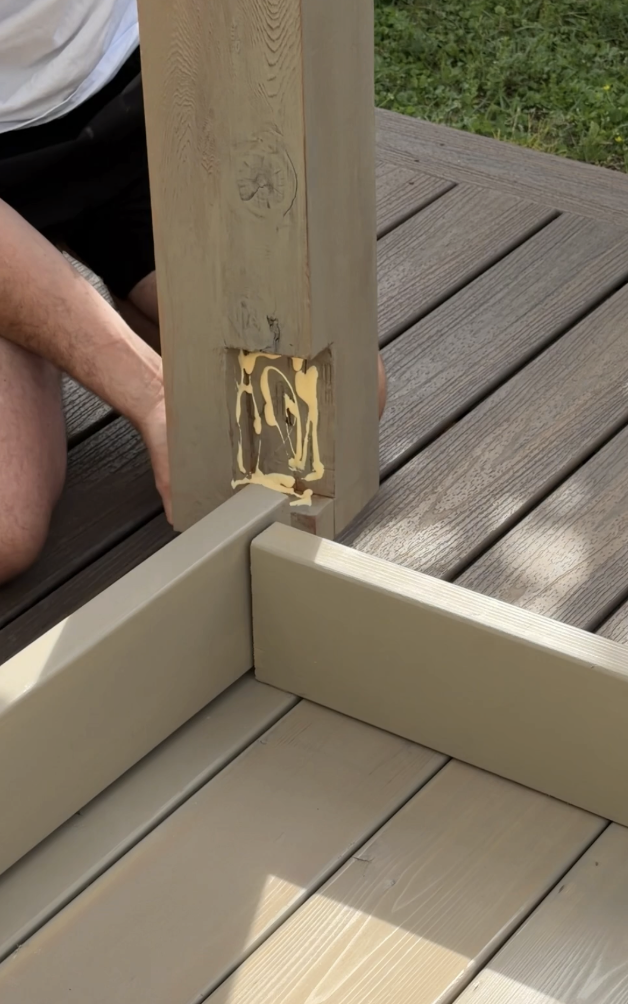
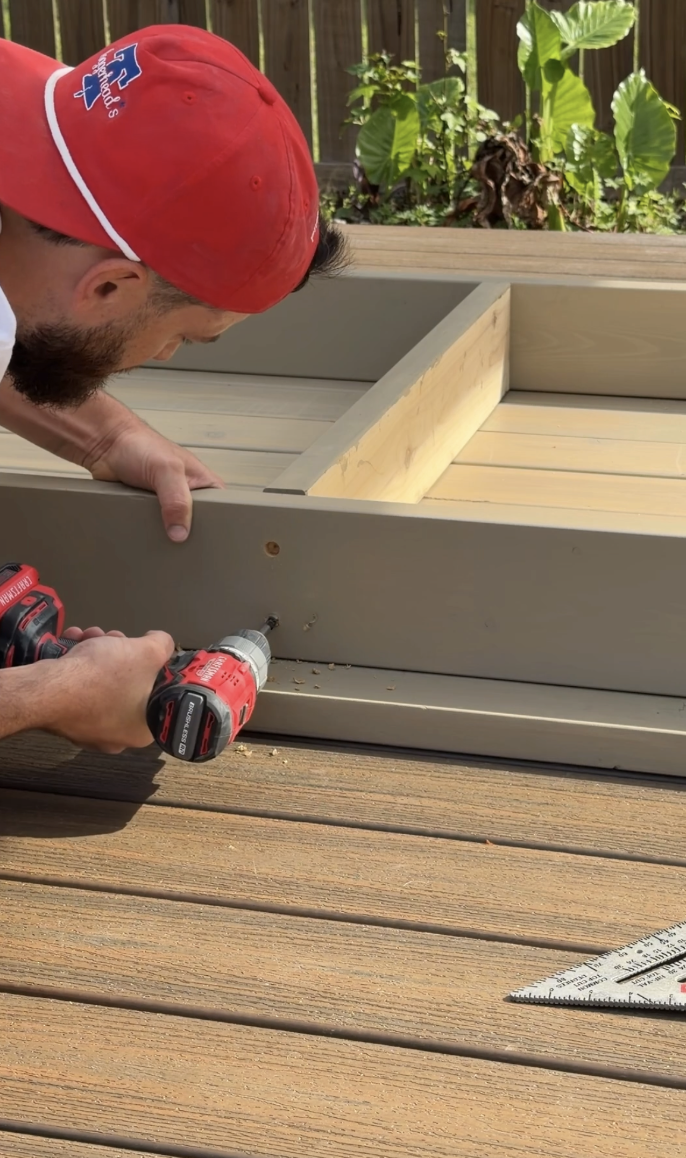
Step 5: Install the Legs
Dry fit everything first.
Once aligned:
- Add wood glue
- Secure with screws
- Countersink using a 1/2” Forstner bit
- Plug with dowels
Focus on:
- Flush connections
- Keeping everything level
- Solid structure
At this point, it should feel rock solid.
Step 6: Attach Tabletop to Frame
With the frame flipped:
- Lay out your boards
- Use 3/16” spacers between each board
- Secure using L brackets (4 per board)
This allows for expansion and contraction outdoors.
Lightly sand again before finishing.
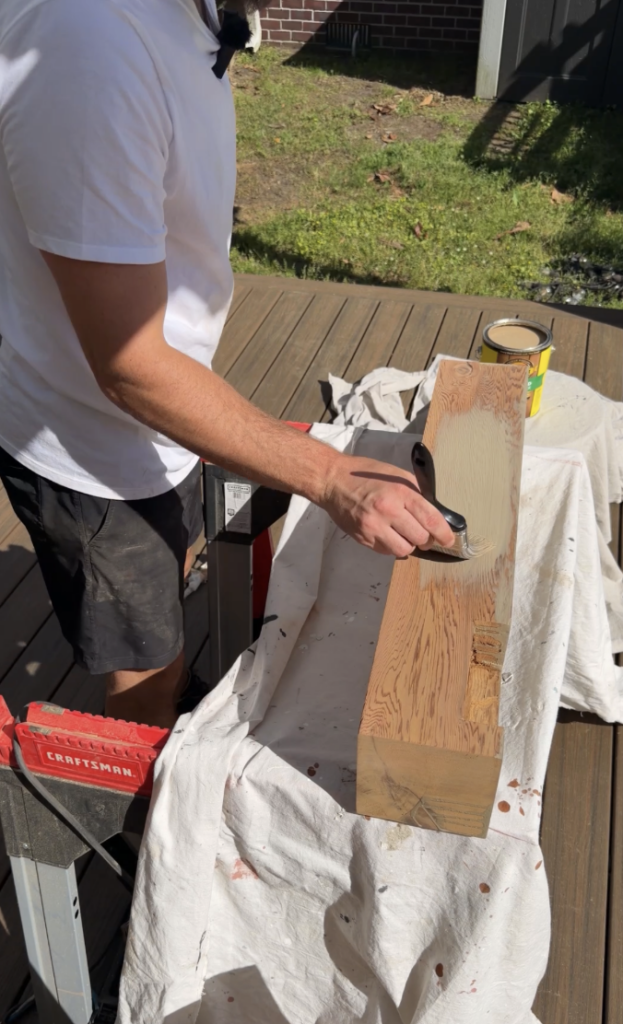

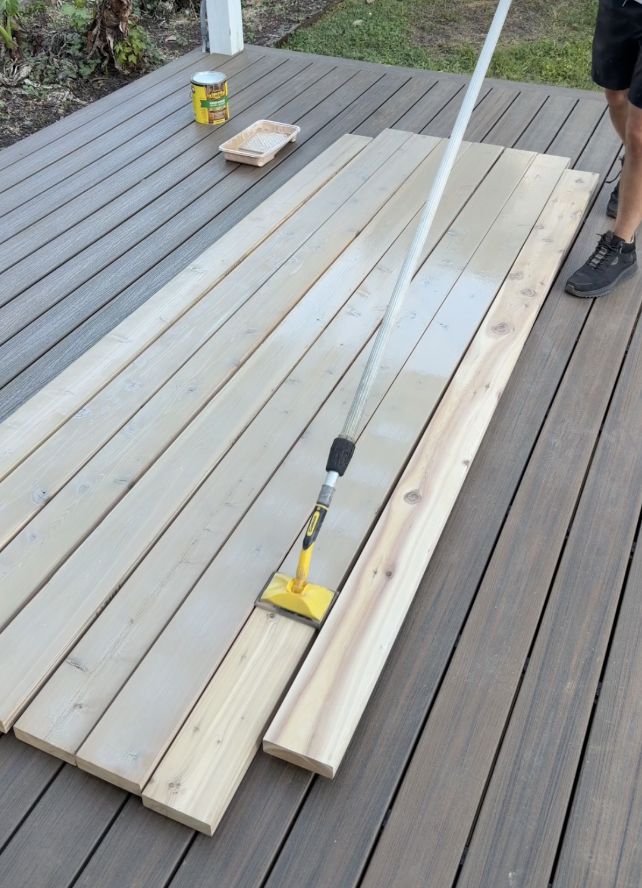
Step 7: Stain and Seal
This is where it all comes together.
Apply your exterior stain using a stain pad.
I used Cabot – Acorn, which gives a warm tone that plays really well with my outdoor palette.
Key tips:
- Long, even strokes
- No pooling
- Full coverage on ALL sides
Apply 2–3 coats.
Step 8: Clear Coat
After staining:
- Light sand (220 grit)
- Apply exterior clear coat
This adds:
Longer lifespan
Extra durability
UV protection
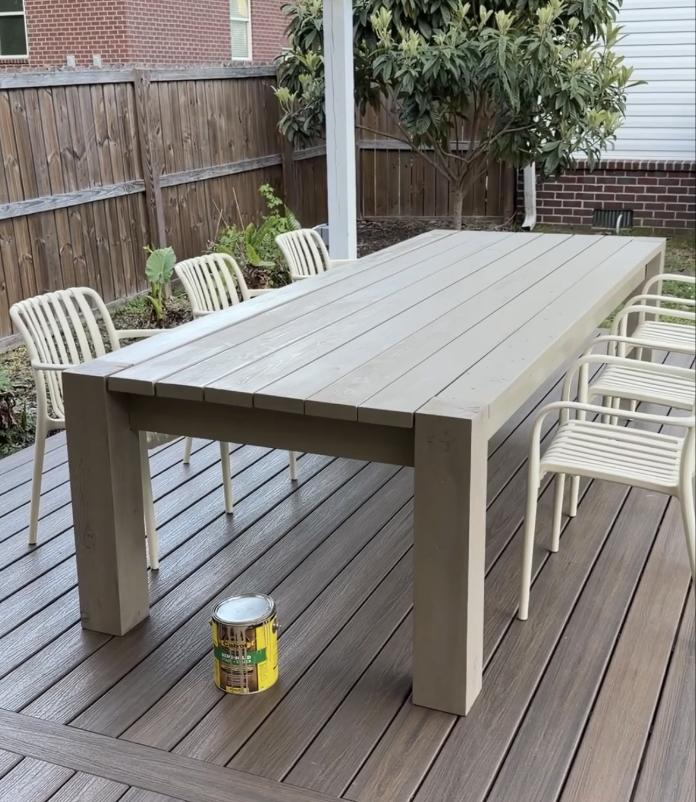
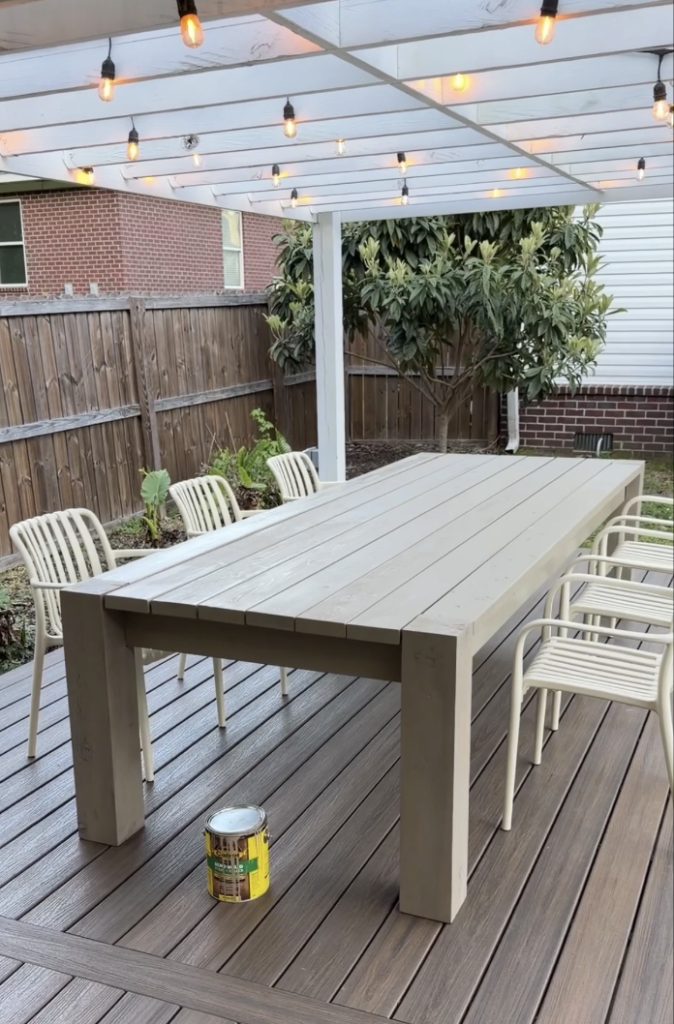
The Final Look
What you end up with is a centerpiece for your backyard. It’s built for hosting, built to last, and honestly just hits different knowing you made it yourself.
For more projects and updates, follow along @thebuchaus.

Comments will load here